


Violet Swiss Cake Roll (GF)

Filling (SMBC)*
5 egg whites**
1 cup + 2 tbsp granulated sugar
300g unsalted butter, softened
2 tsp violet syrup
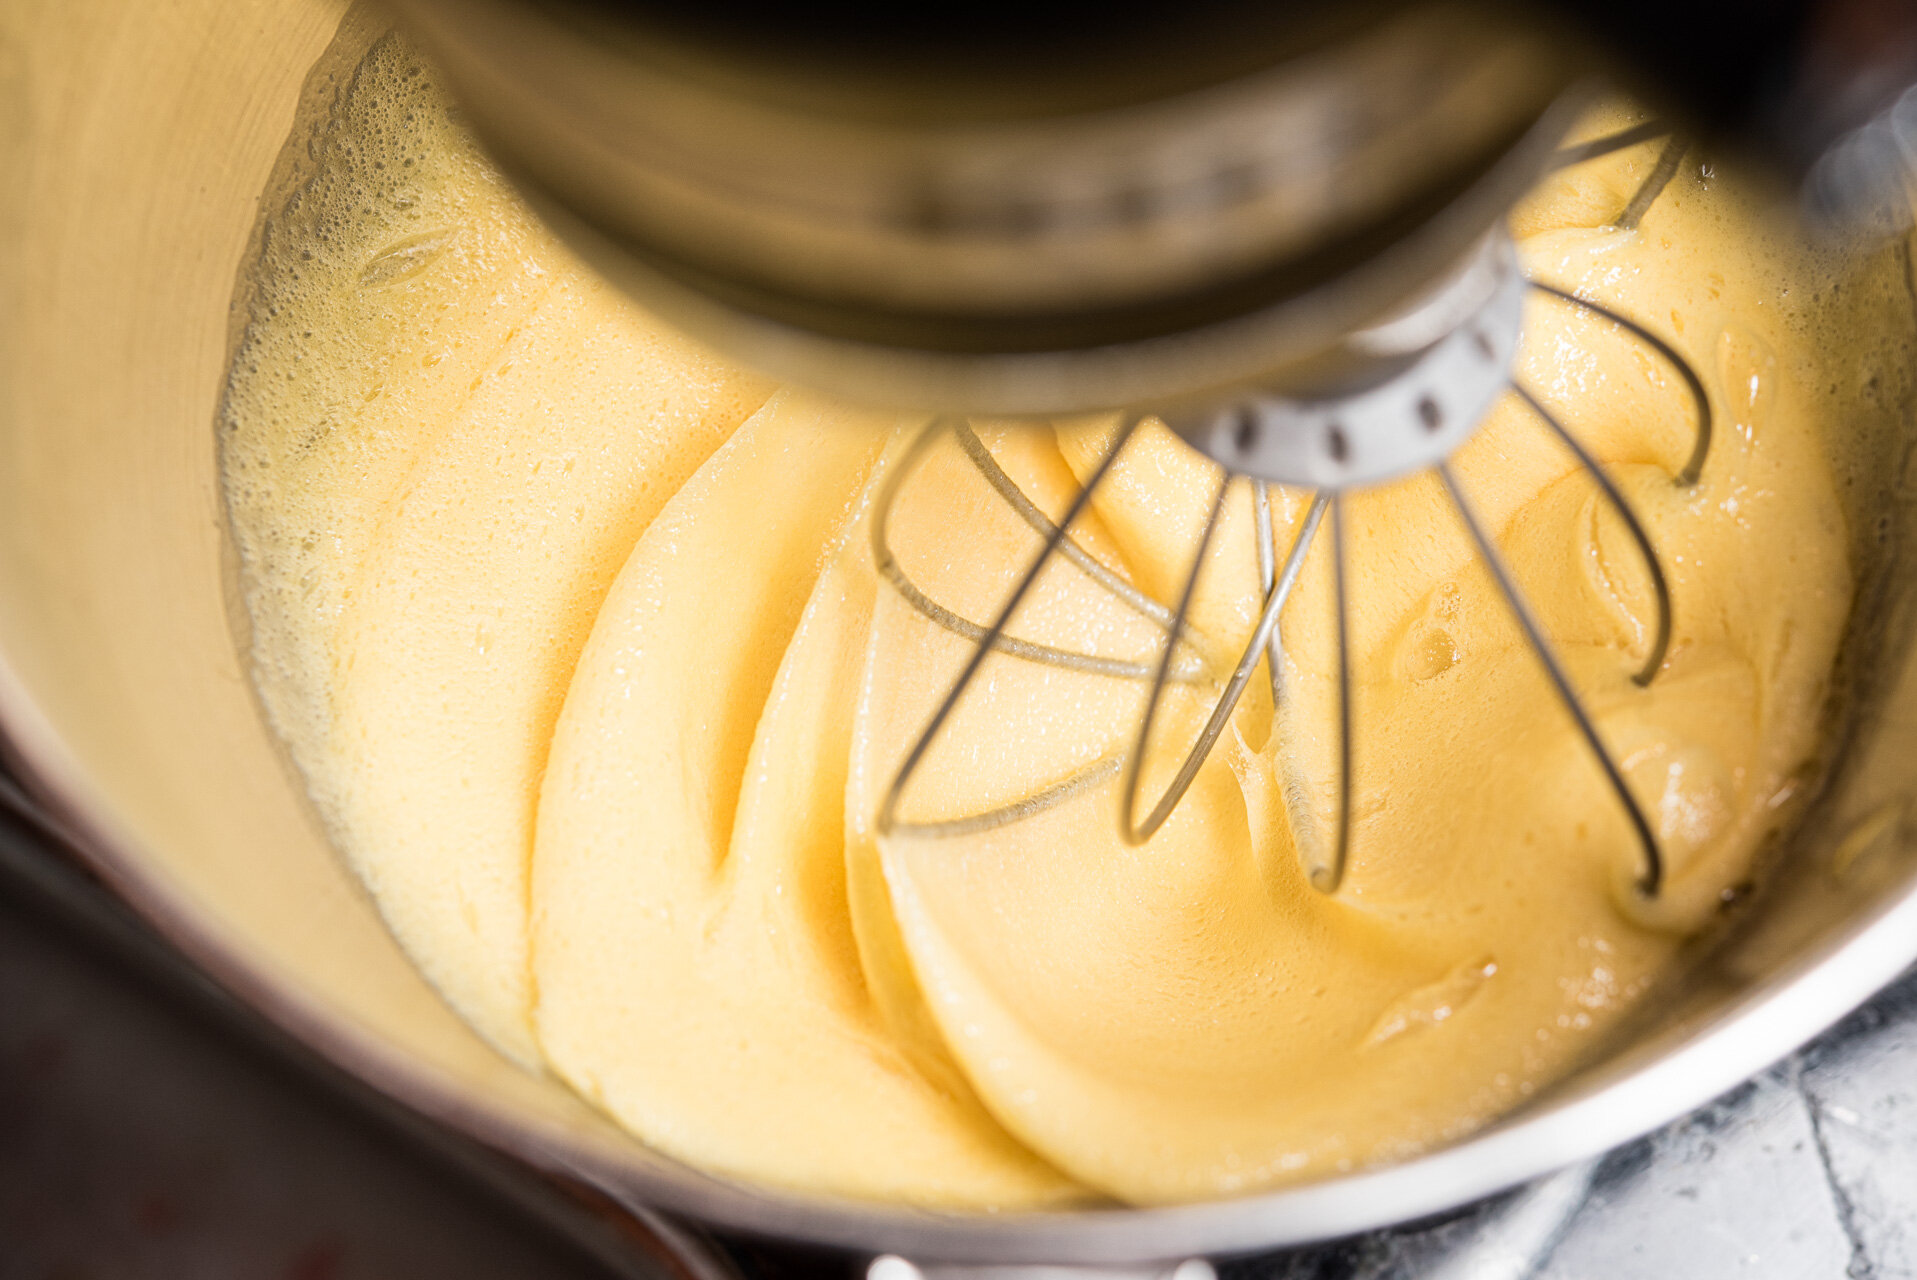
In your stand mixer bowl, combine egg whites and sugar and heat with a bain-marie, stirring constantly, until the mixture reaches 150˚F. Remove from heat and attach bowl to stand mixer. With the whisk attachment, whisk egg mixture on medium speed for several minutes. The mixture will cool as the eggs whip up into a meringue. Whip until they reach stiff peaks.
Remove whisk attachment and replace with the paddle. Turn mixer on to low and slowly begin to add softened butter, one tablespoon at a time. The egg mixture will begin to deflate.
Continue adding butter until all of it has been added to the bowl. It’s likely that the mixture will look split or curdled. This is normal. It takes time for the butter and egg whites to emulsify. Increase the mixer speed to medium and let it mix for several minutes. The batter should eventually come together into a smooth and light consistency. This could take up to 10 minutes.
If the mixture doesn’t come together, remove the mixing bowl from the stand mixer and place over a pot of bowling water again. Allow the mixture to heat until the mixture closest to the sides of the bowl begin to melt. Remove from the heat and continue mixing with the paddle attachment. In five or so minutes, the mixture should come together.
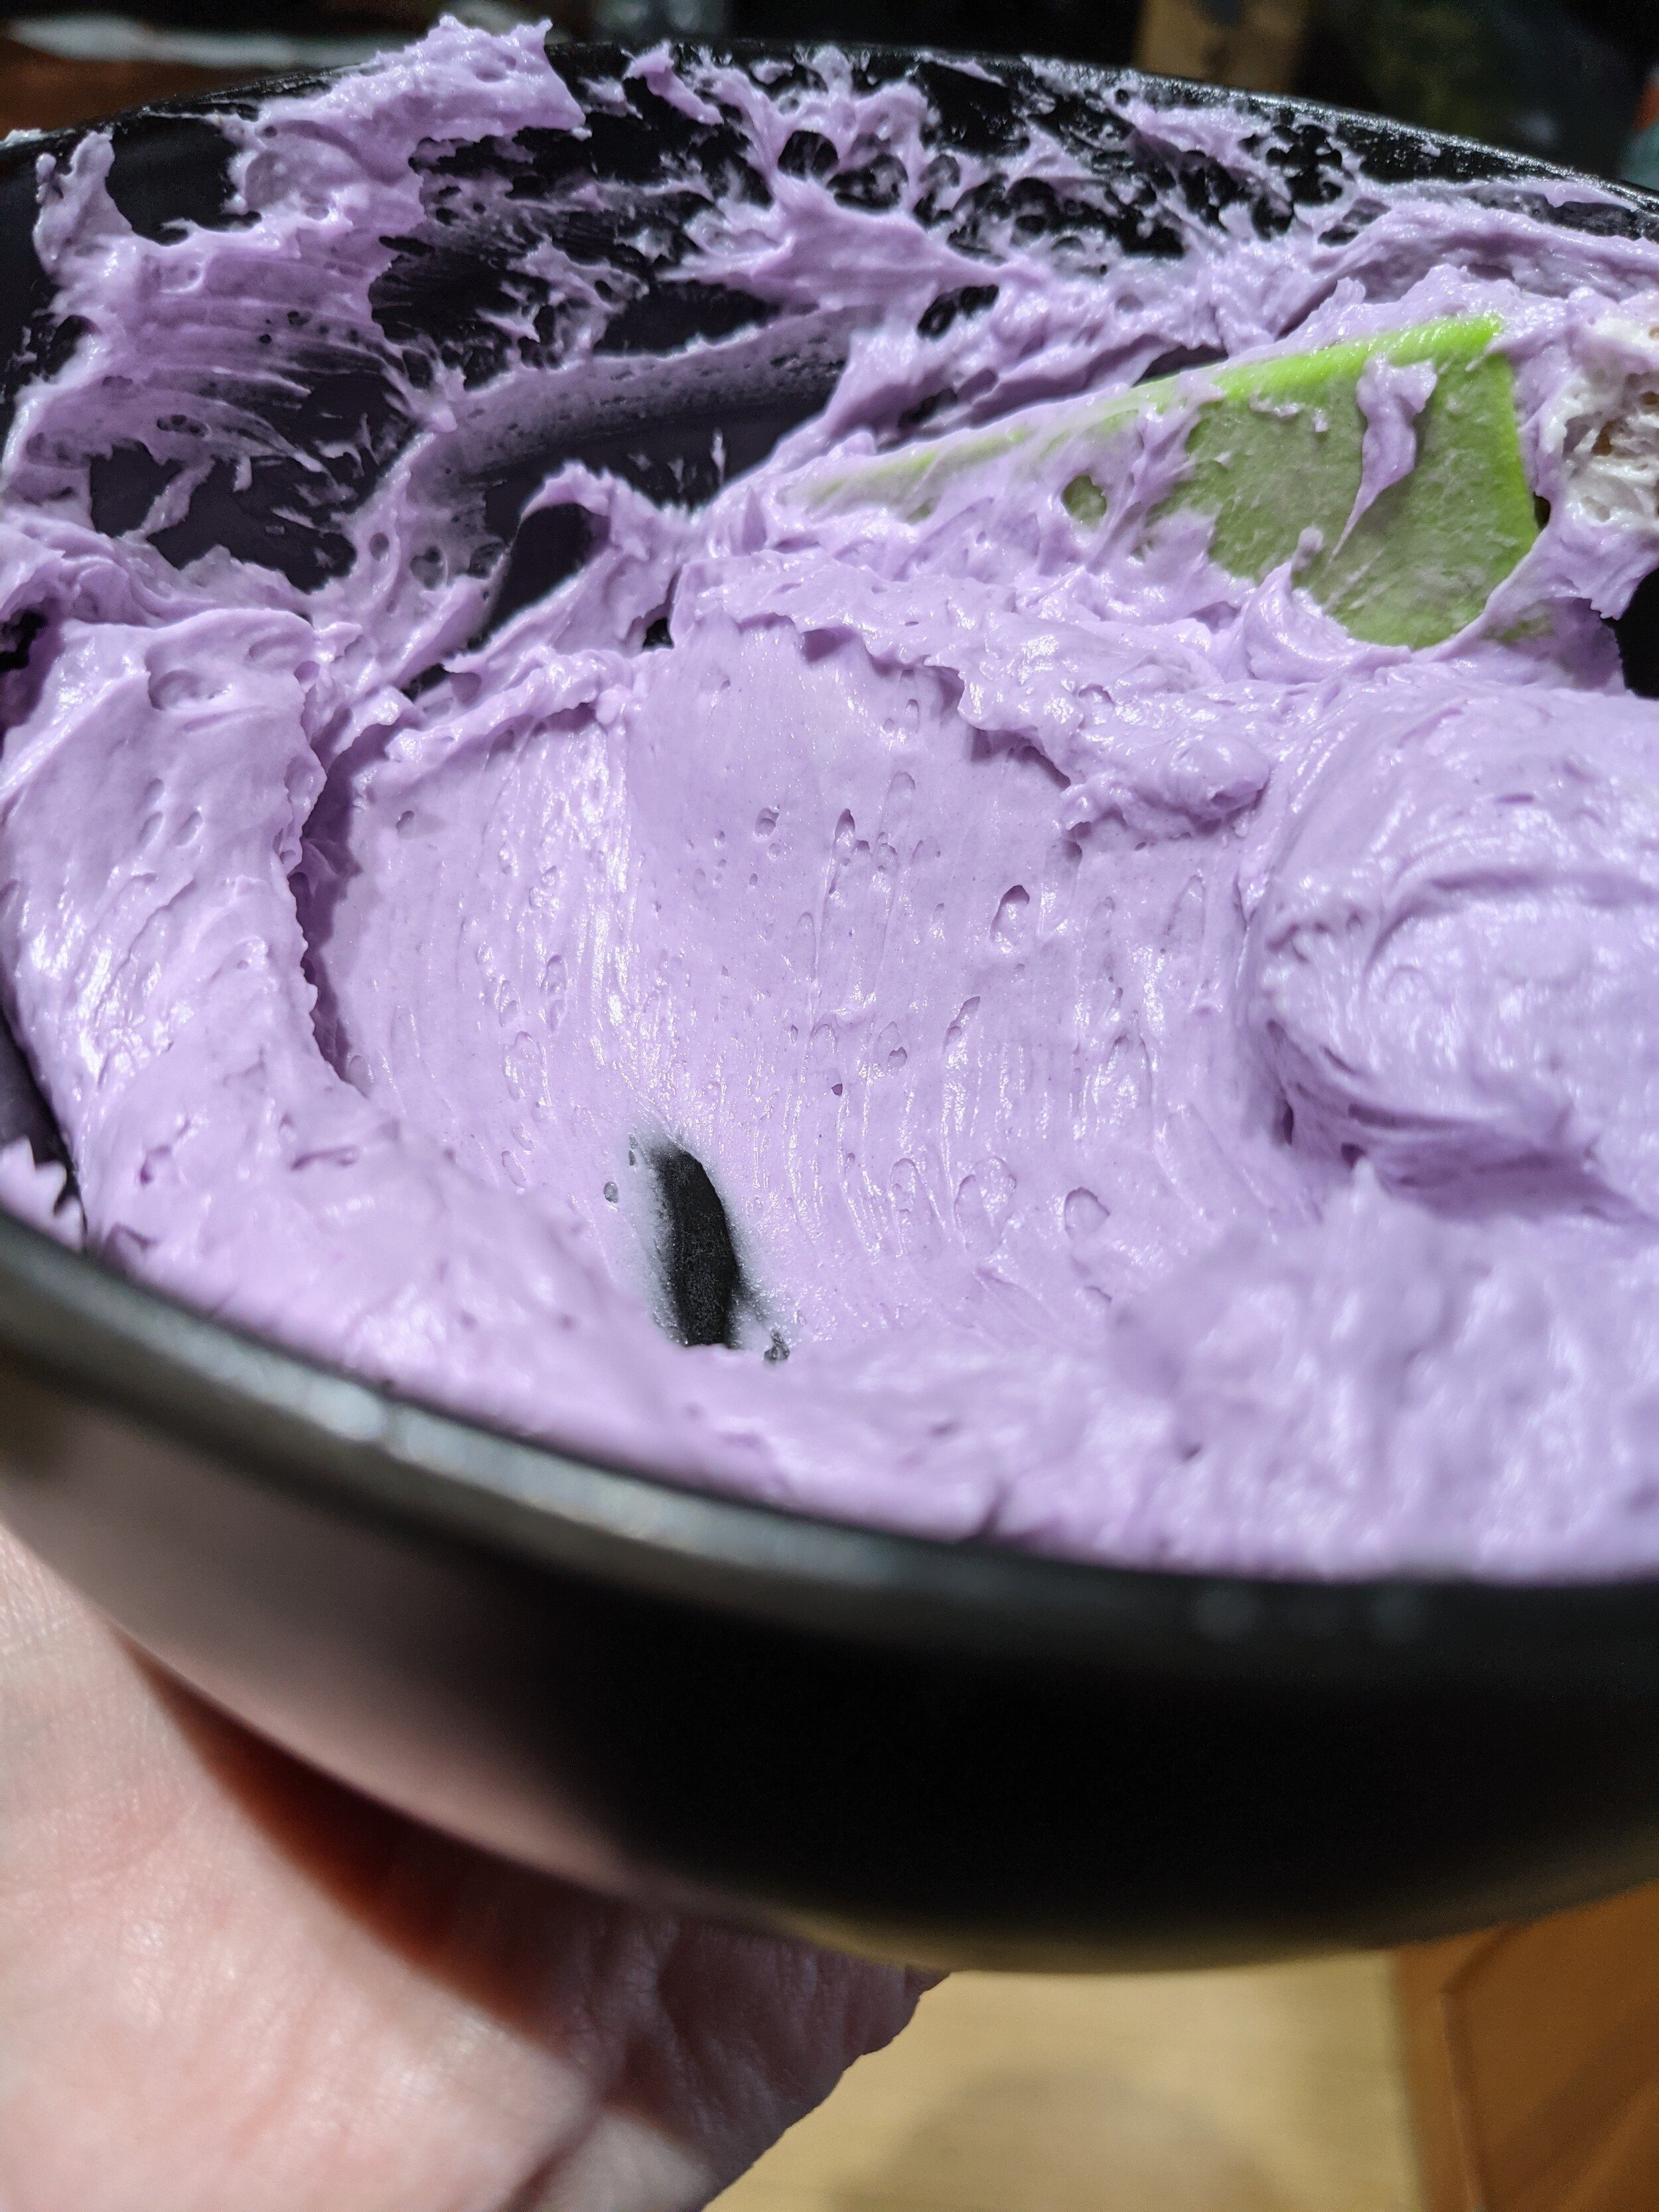
Add two teaspoons of violet syrup, and mix again. Let the buttercream continue to mix for a couple more minutes on medium to aerate and lighten in color. Your final product should be light in texture, color, and should be smooth.
Remove about 2/3 of buttercream and move to an airtight container. Take the remaining buttercream and split into two different bowls to color. Add a drop or less of regal purple to one bowl and a drop or less of soft pink to the other. You can always add some white to lighten the colors, or mix in some of the uncolored buttercream. Mix colors with a rubber spatula and place in air tight containers until ready to use. You can leave them on the counter for 2-3 days or in the fridge for up to two weeks. In both cases, you MUST mix the buttercream again when ready to use (can be done by hand, with a hand mixer, or with the stand mixer with the paddle attachment).
Cake
1/4 cup cocoa powder
1/3 cup Bob's Red Mill 1-1 Gluten Free Flour
1/2 tsp baking soda (optional)***
1/4 tsp fine salt
4 large eggs
1/2 granulated sugar
4 tbsp unsalted butter, melted and cooled (but not solid)
1 tsp vanilla
Prepare a large pot with a couple inches of water and begin heating to use as a bain-marie. Preheat over to 350˚F. Grease a deep cookie sheet (11x17), or jelly roll pan (10x15), top with parchment, and grease parchment as well. Set aside.
In a small bowl, sift cocoa powder and gluten free flour together. Add salt and baking soda, if using, and stir together to evenly distribute. Set aside.
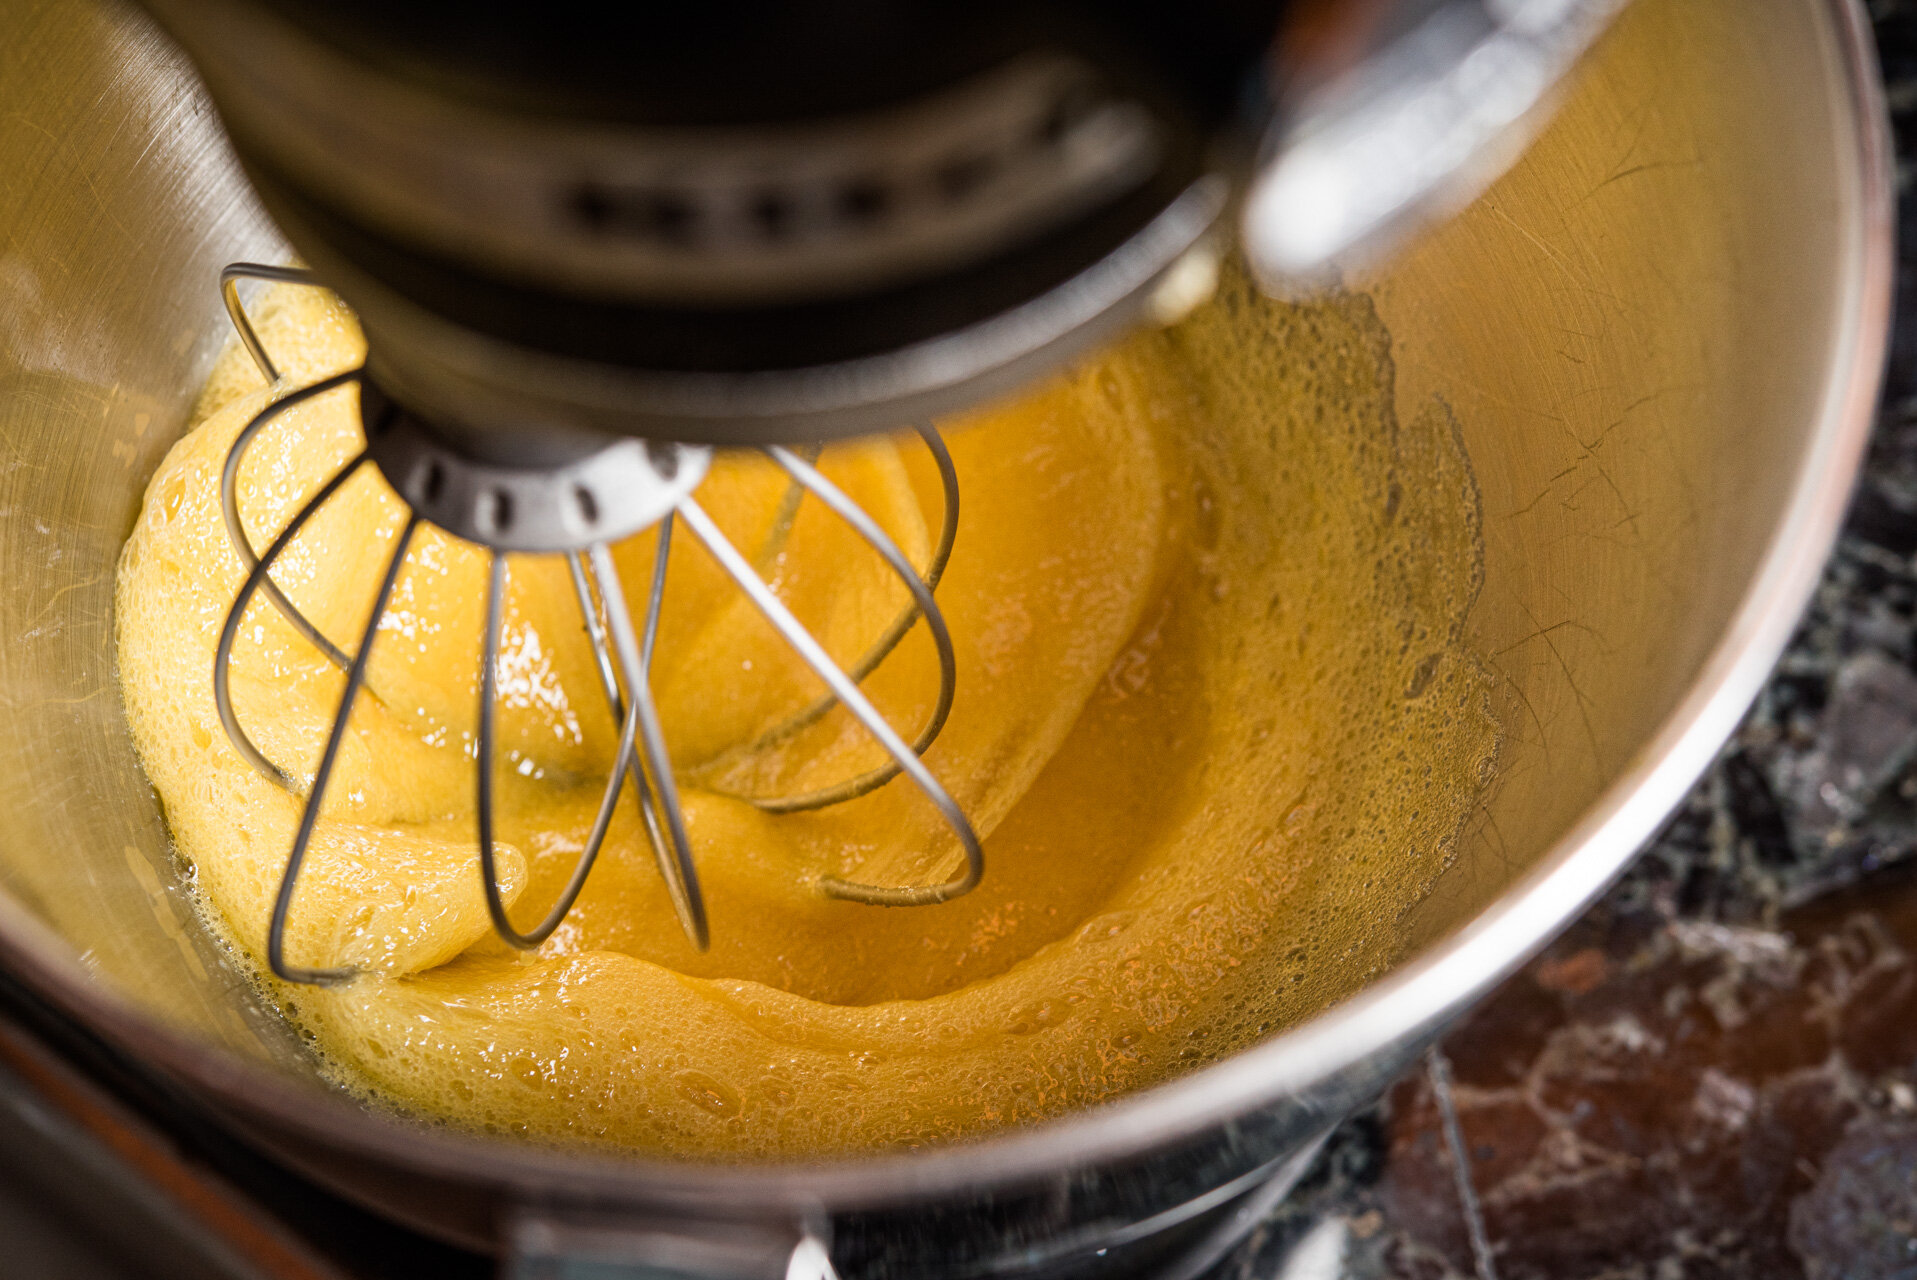
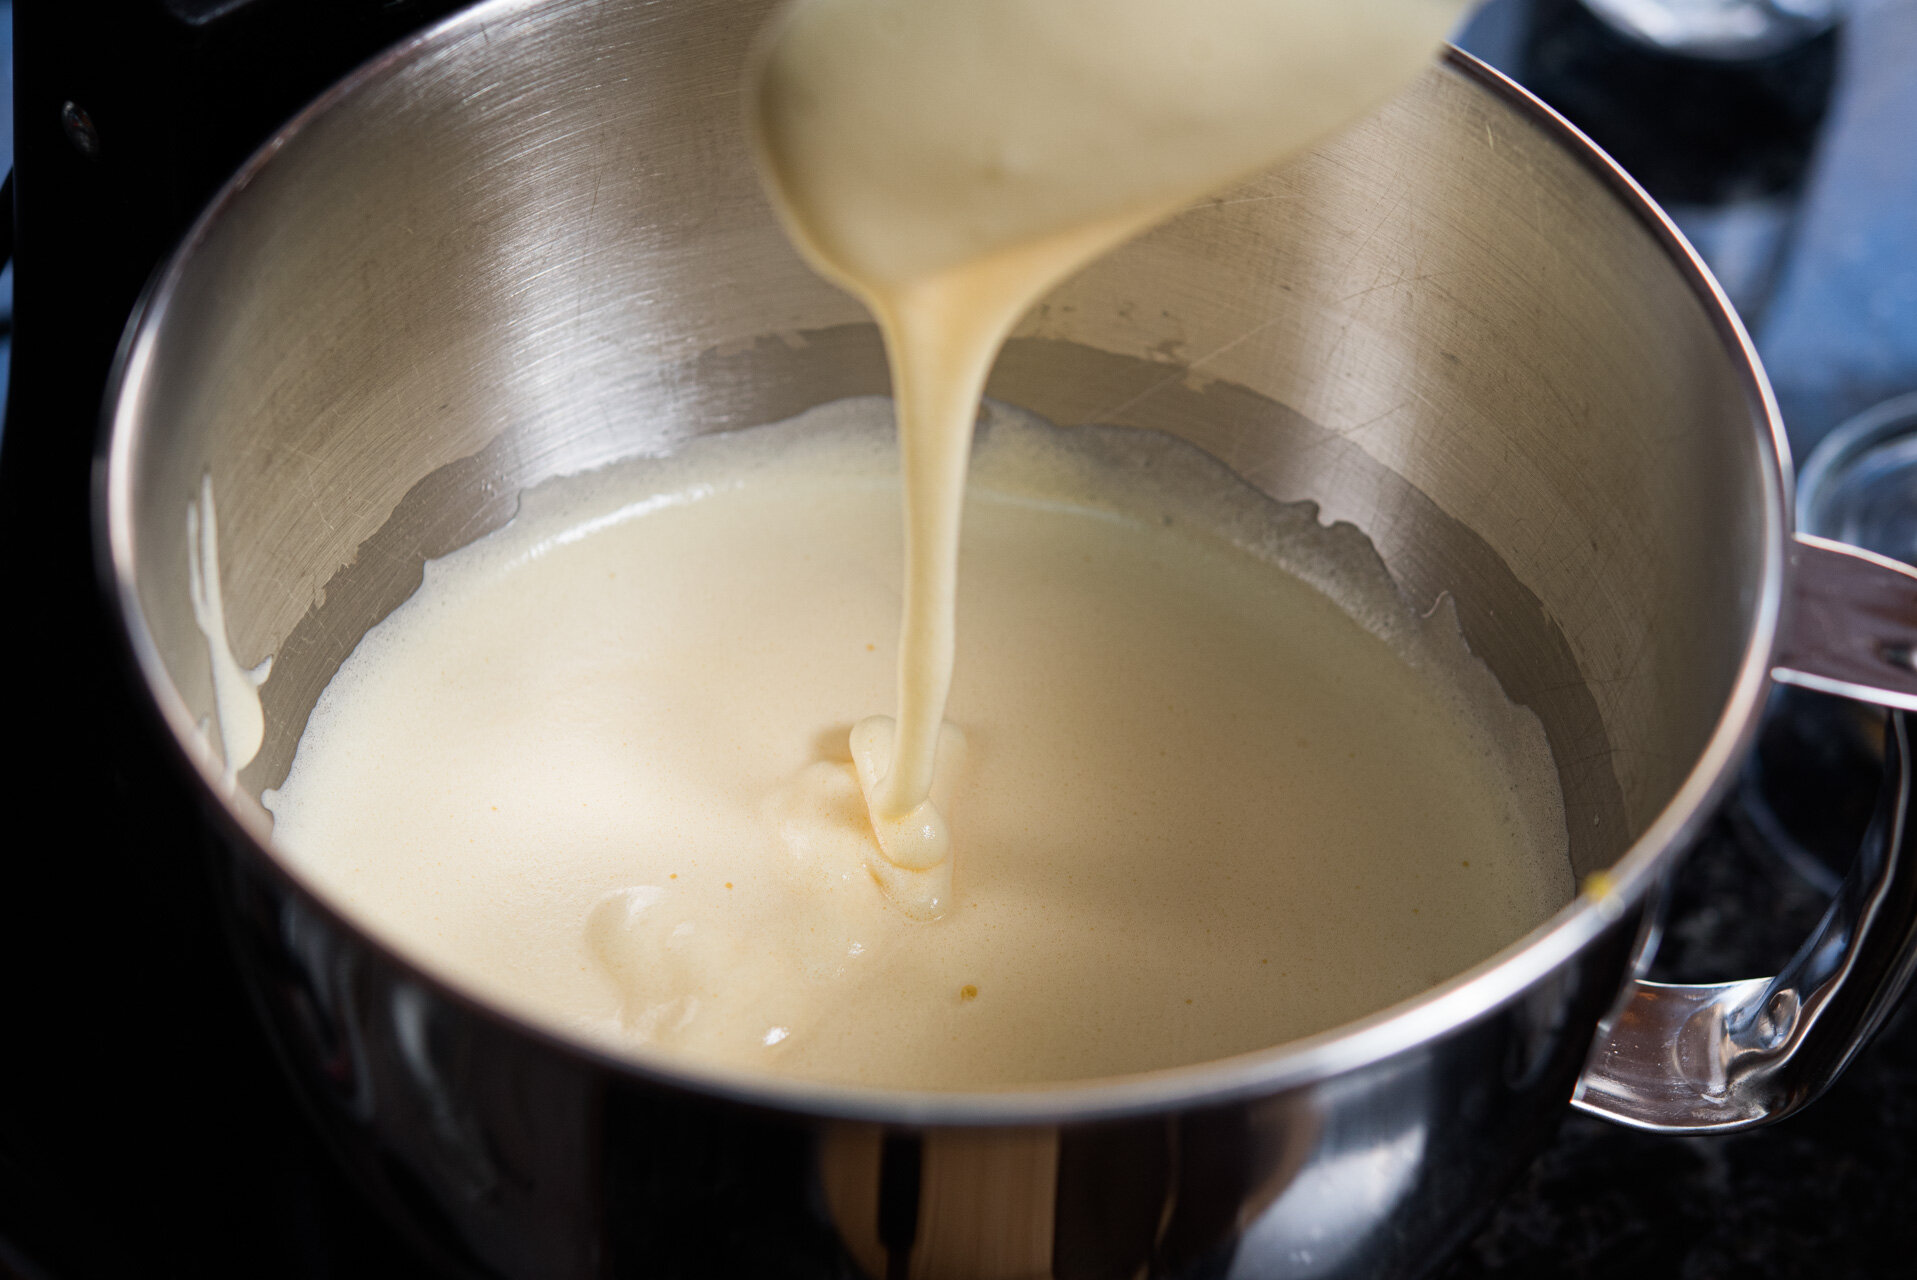
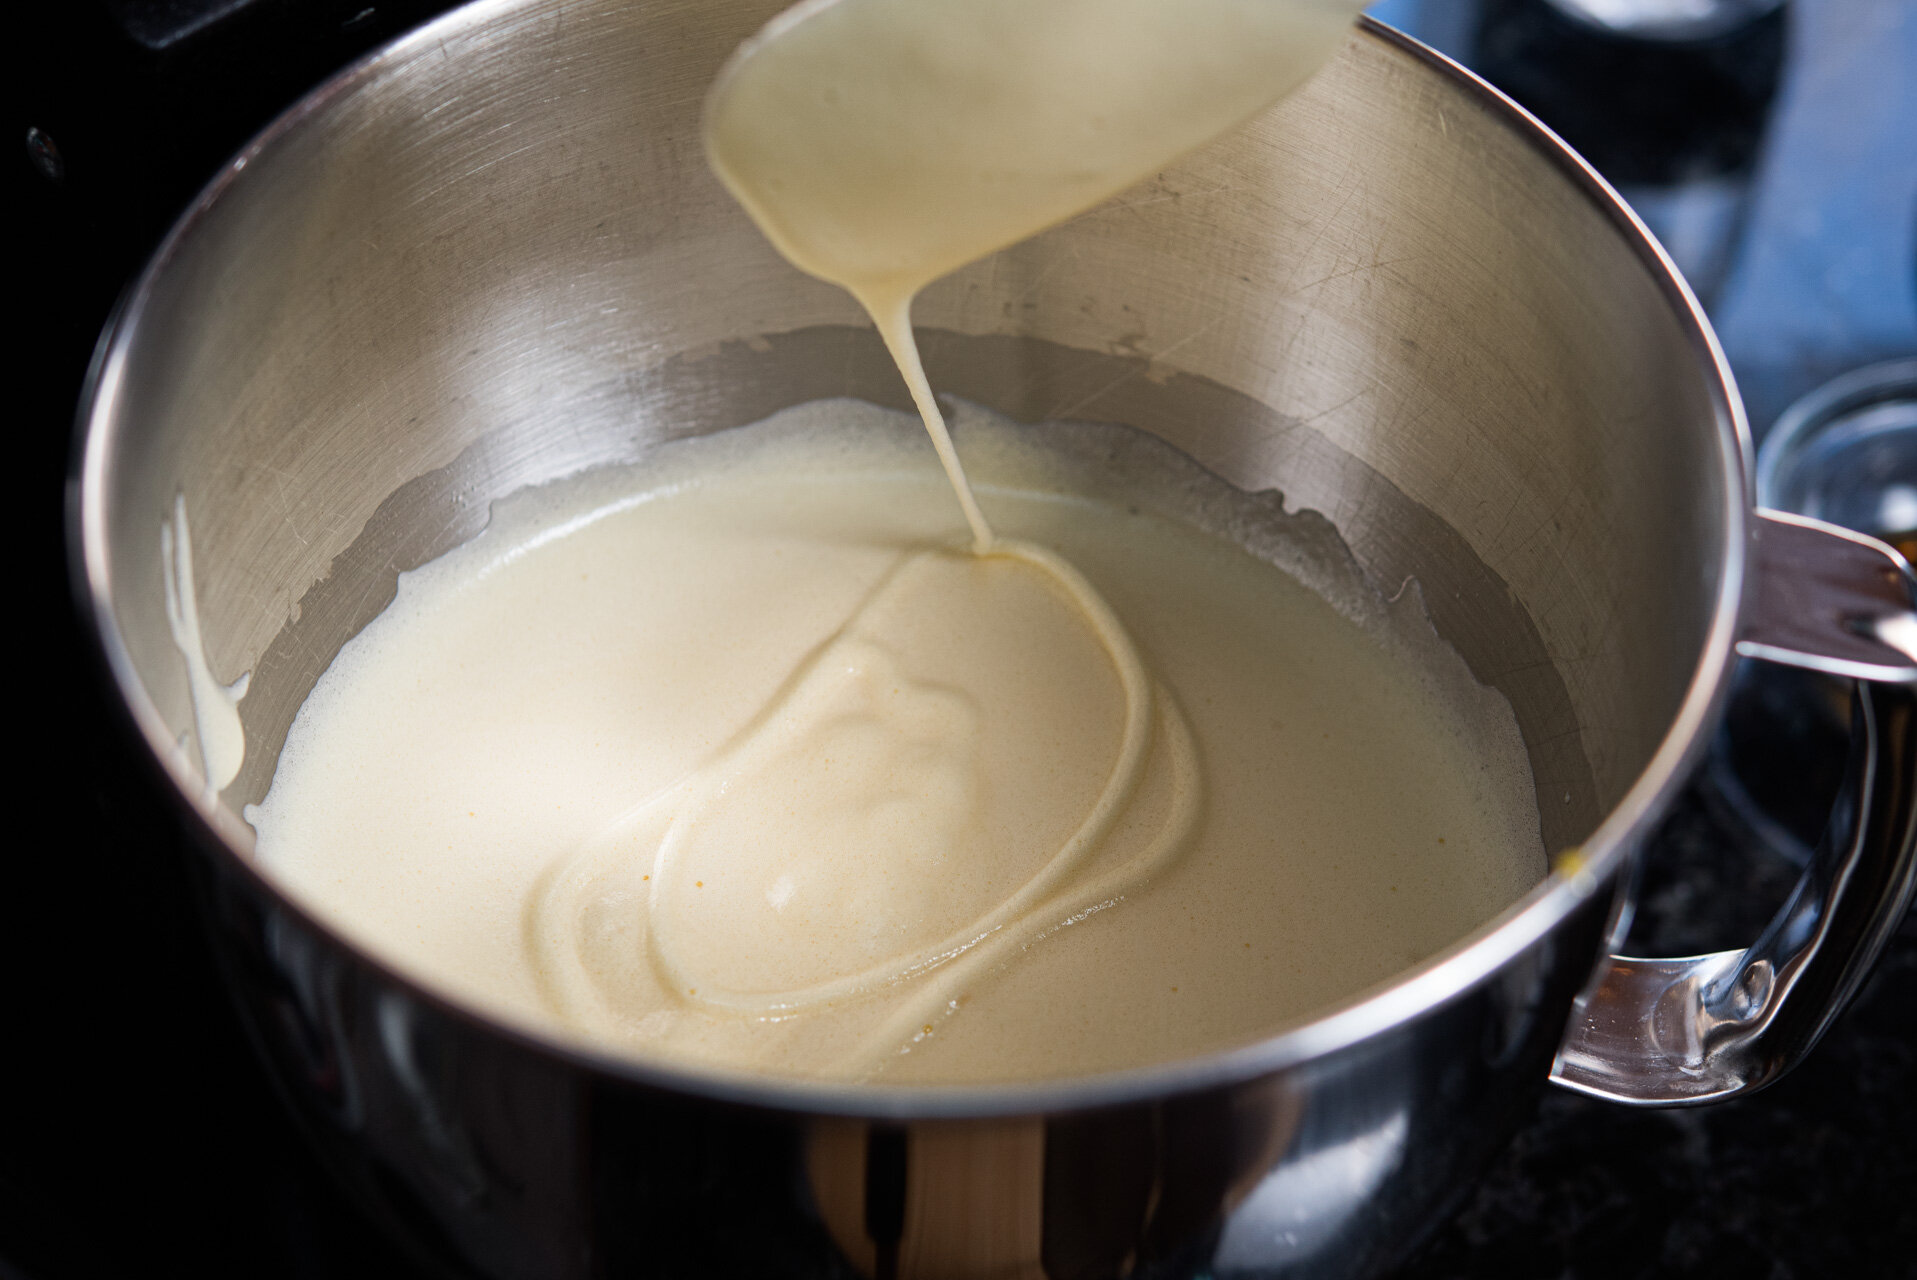
Crack eggs into the bowl of your stand mixer and add sugar. Do NOT combine these two items until you are ready to begin stirring as the sugar will start to cook the egg yolks. Place bowl over the pot of boiling water and begin stirring with a rubber spatula or wooden spoon. Stir continuously until the mixture has reached 120˚F. Remove from heat and attach to stand mixer. Using the whisk attachment, whip eggs on medium speed for several minutes. The mixture must reach the ribbon stage (to check, lift some of the mixture with a spoon and allow it to run off back into the bowl. It should take between 5-10 seconds for the mixture to sink back in to the rest of the mixture).
Once the mixture reaches the ribbon stage, lower the mixing speed to low, and add melted butter and vanilla extract. Allow a couple seconds for them to be incorporated.
Slowly add in the dry mixture you created with cocoa and flour while the mixer is still running on low. You aren’t whipping air in at this speed, you are just incorporating the dry ingredients gently. You can also do this by folding with a rubber spatula by hand.
As soon at the mixture is combined, stop the mixer. You do not want to over mix as the air bubbles will pop and the batter will deflate.
Pour batter into prepared cookie sheets and gently spread batter out, evenly over the pan with a spatula or small offset. Place in over and bake for 10-12 minutes.
While the cake is baking, prepare your rolling tools. You will need a large cutting board, or another cookie sheet, and a large strip of parchment, or a tea towel. Have cocoa powder and a sieve ready for dusting.
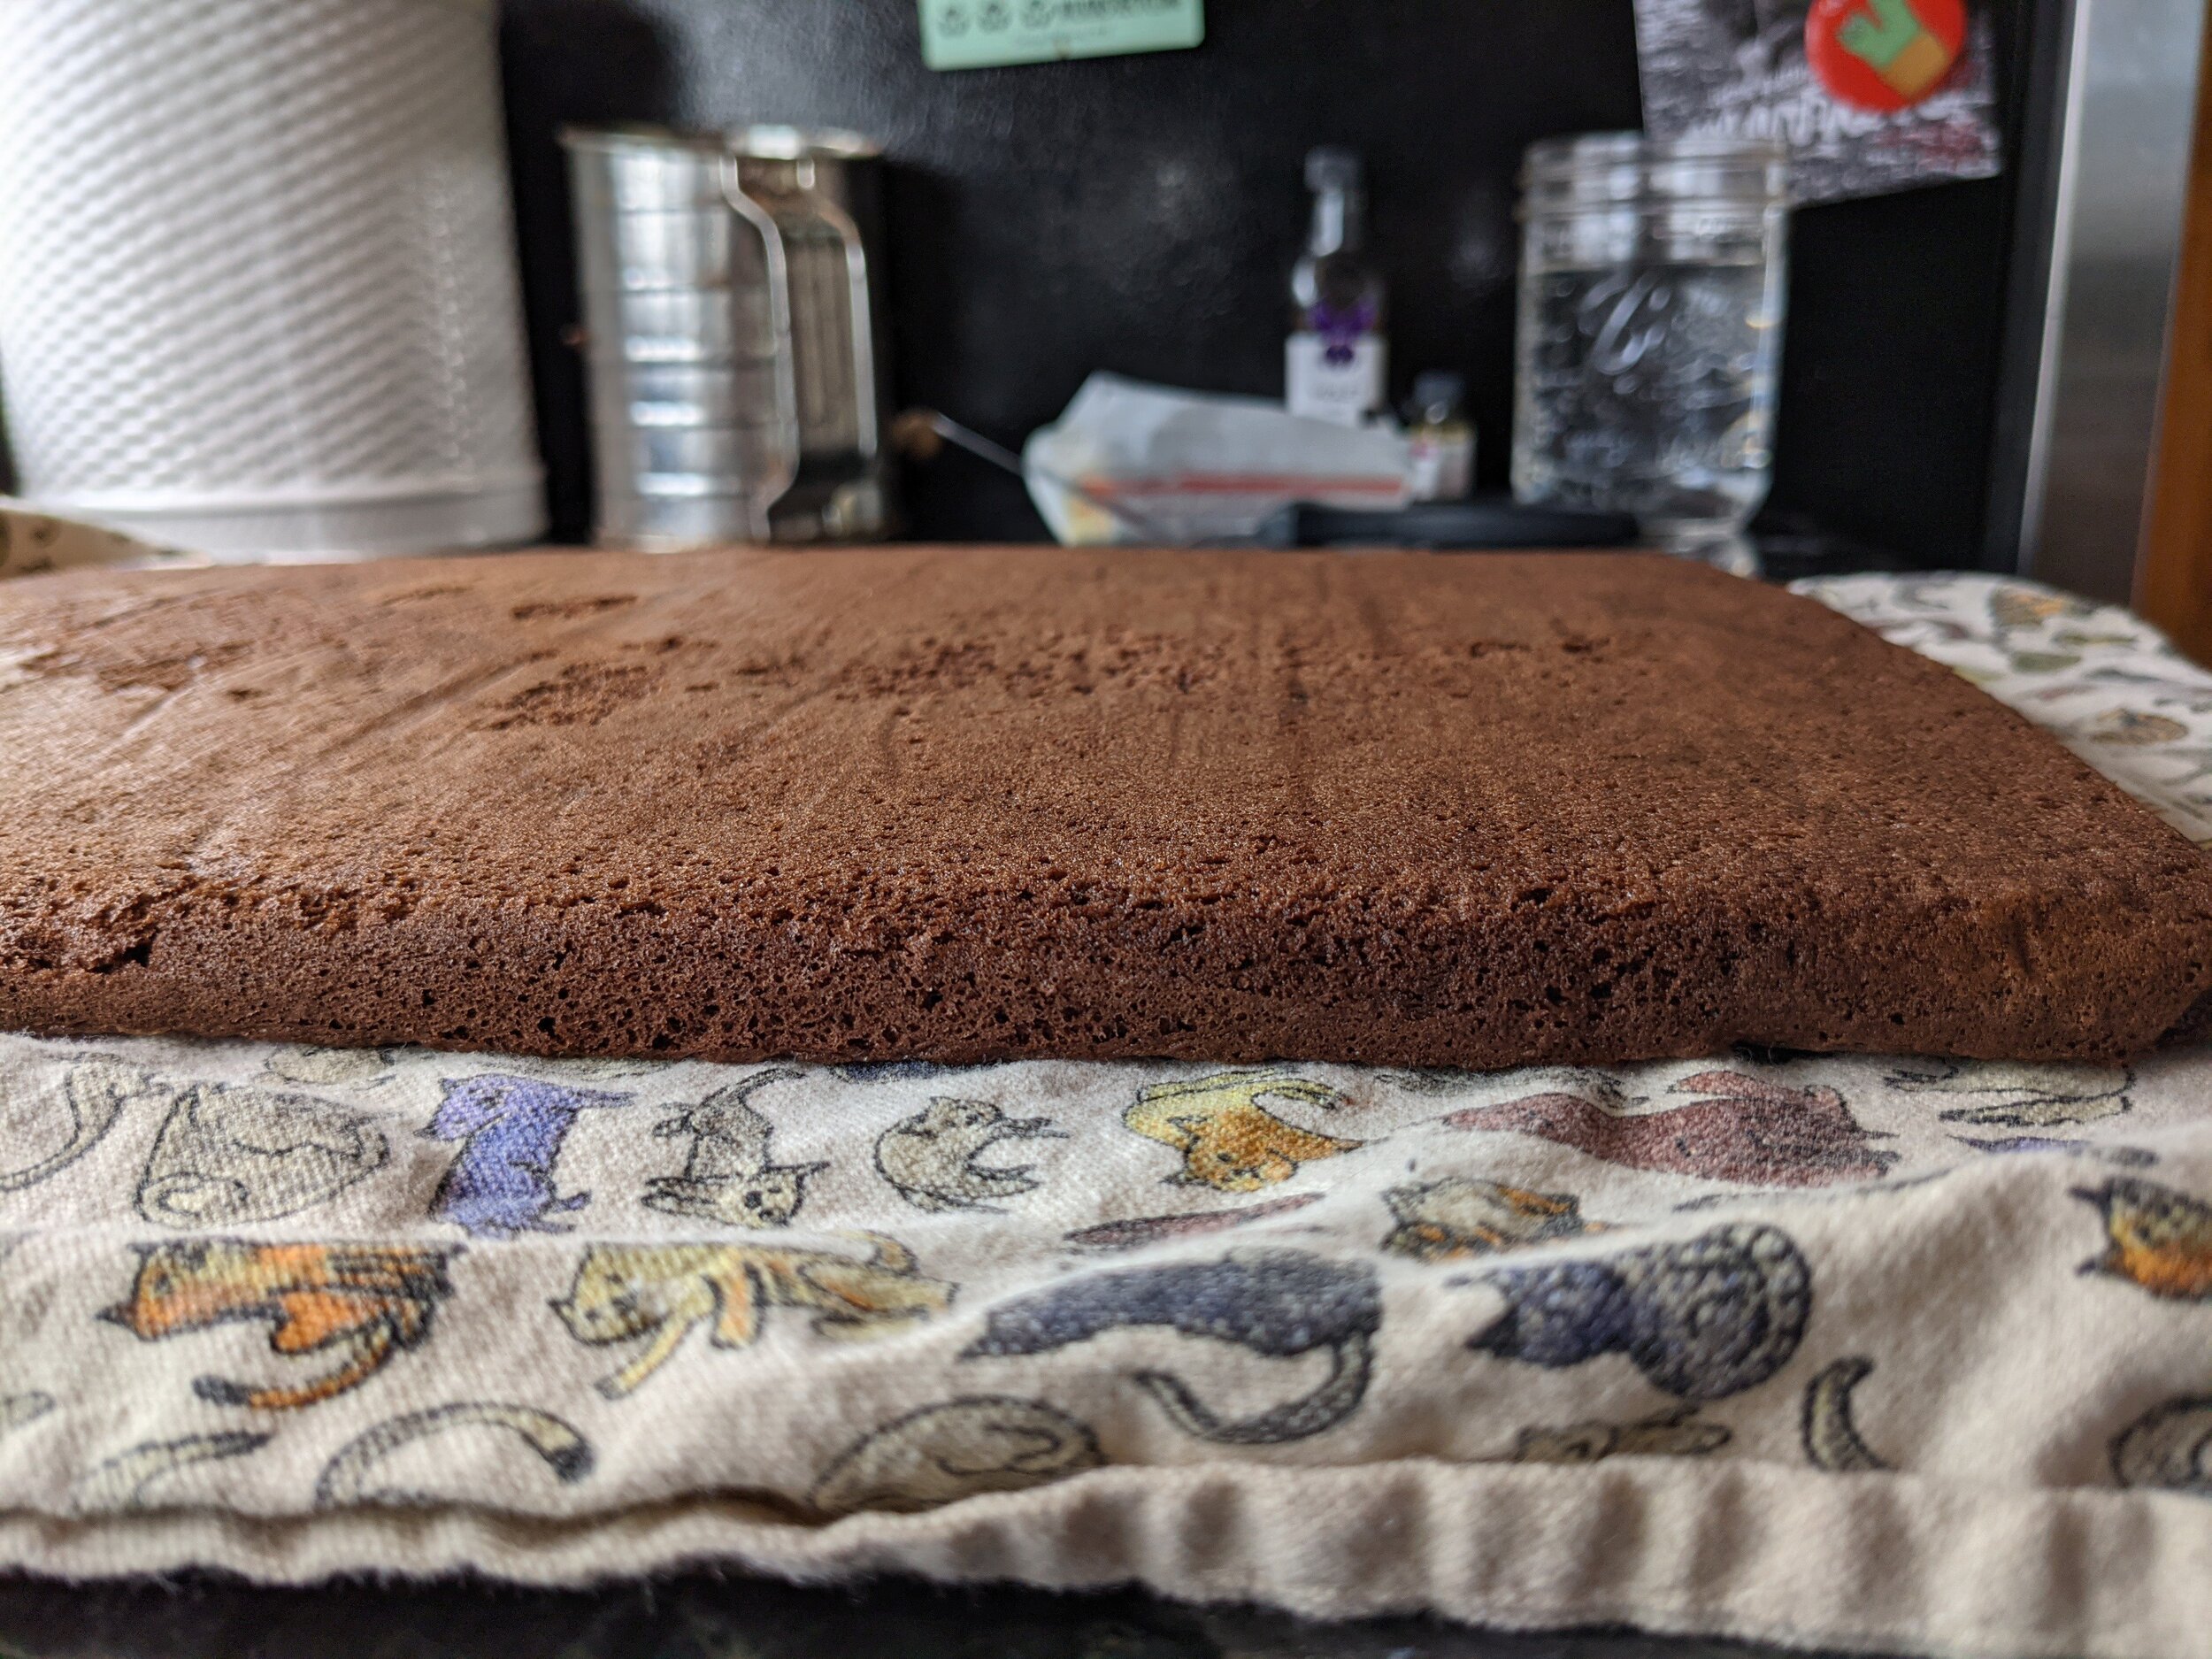
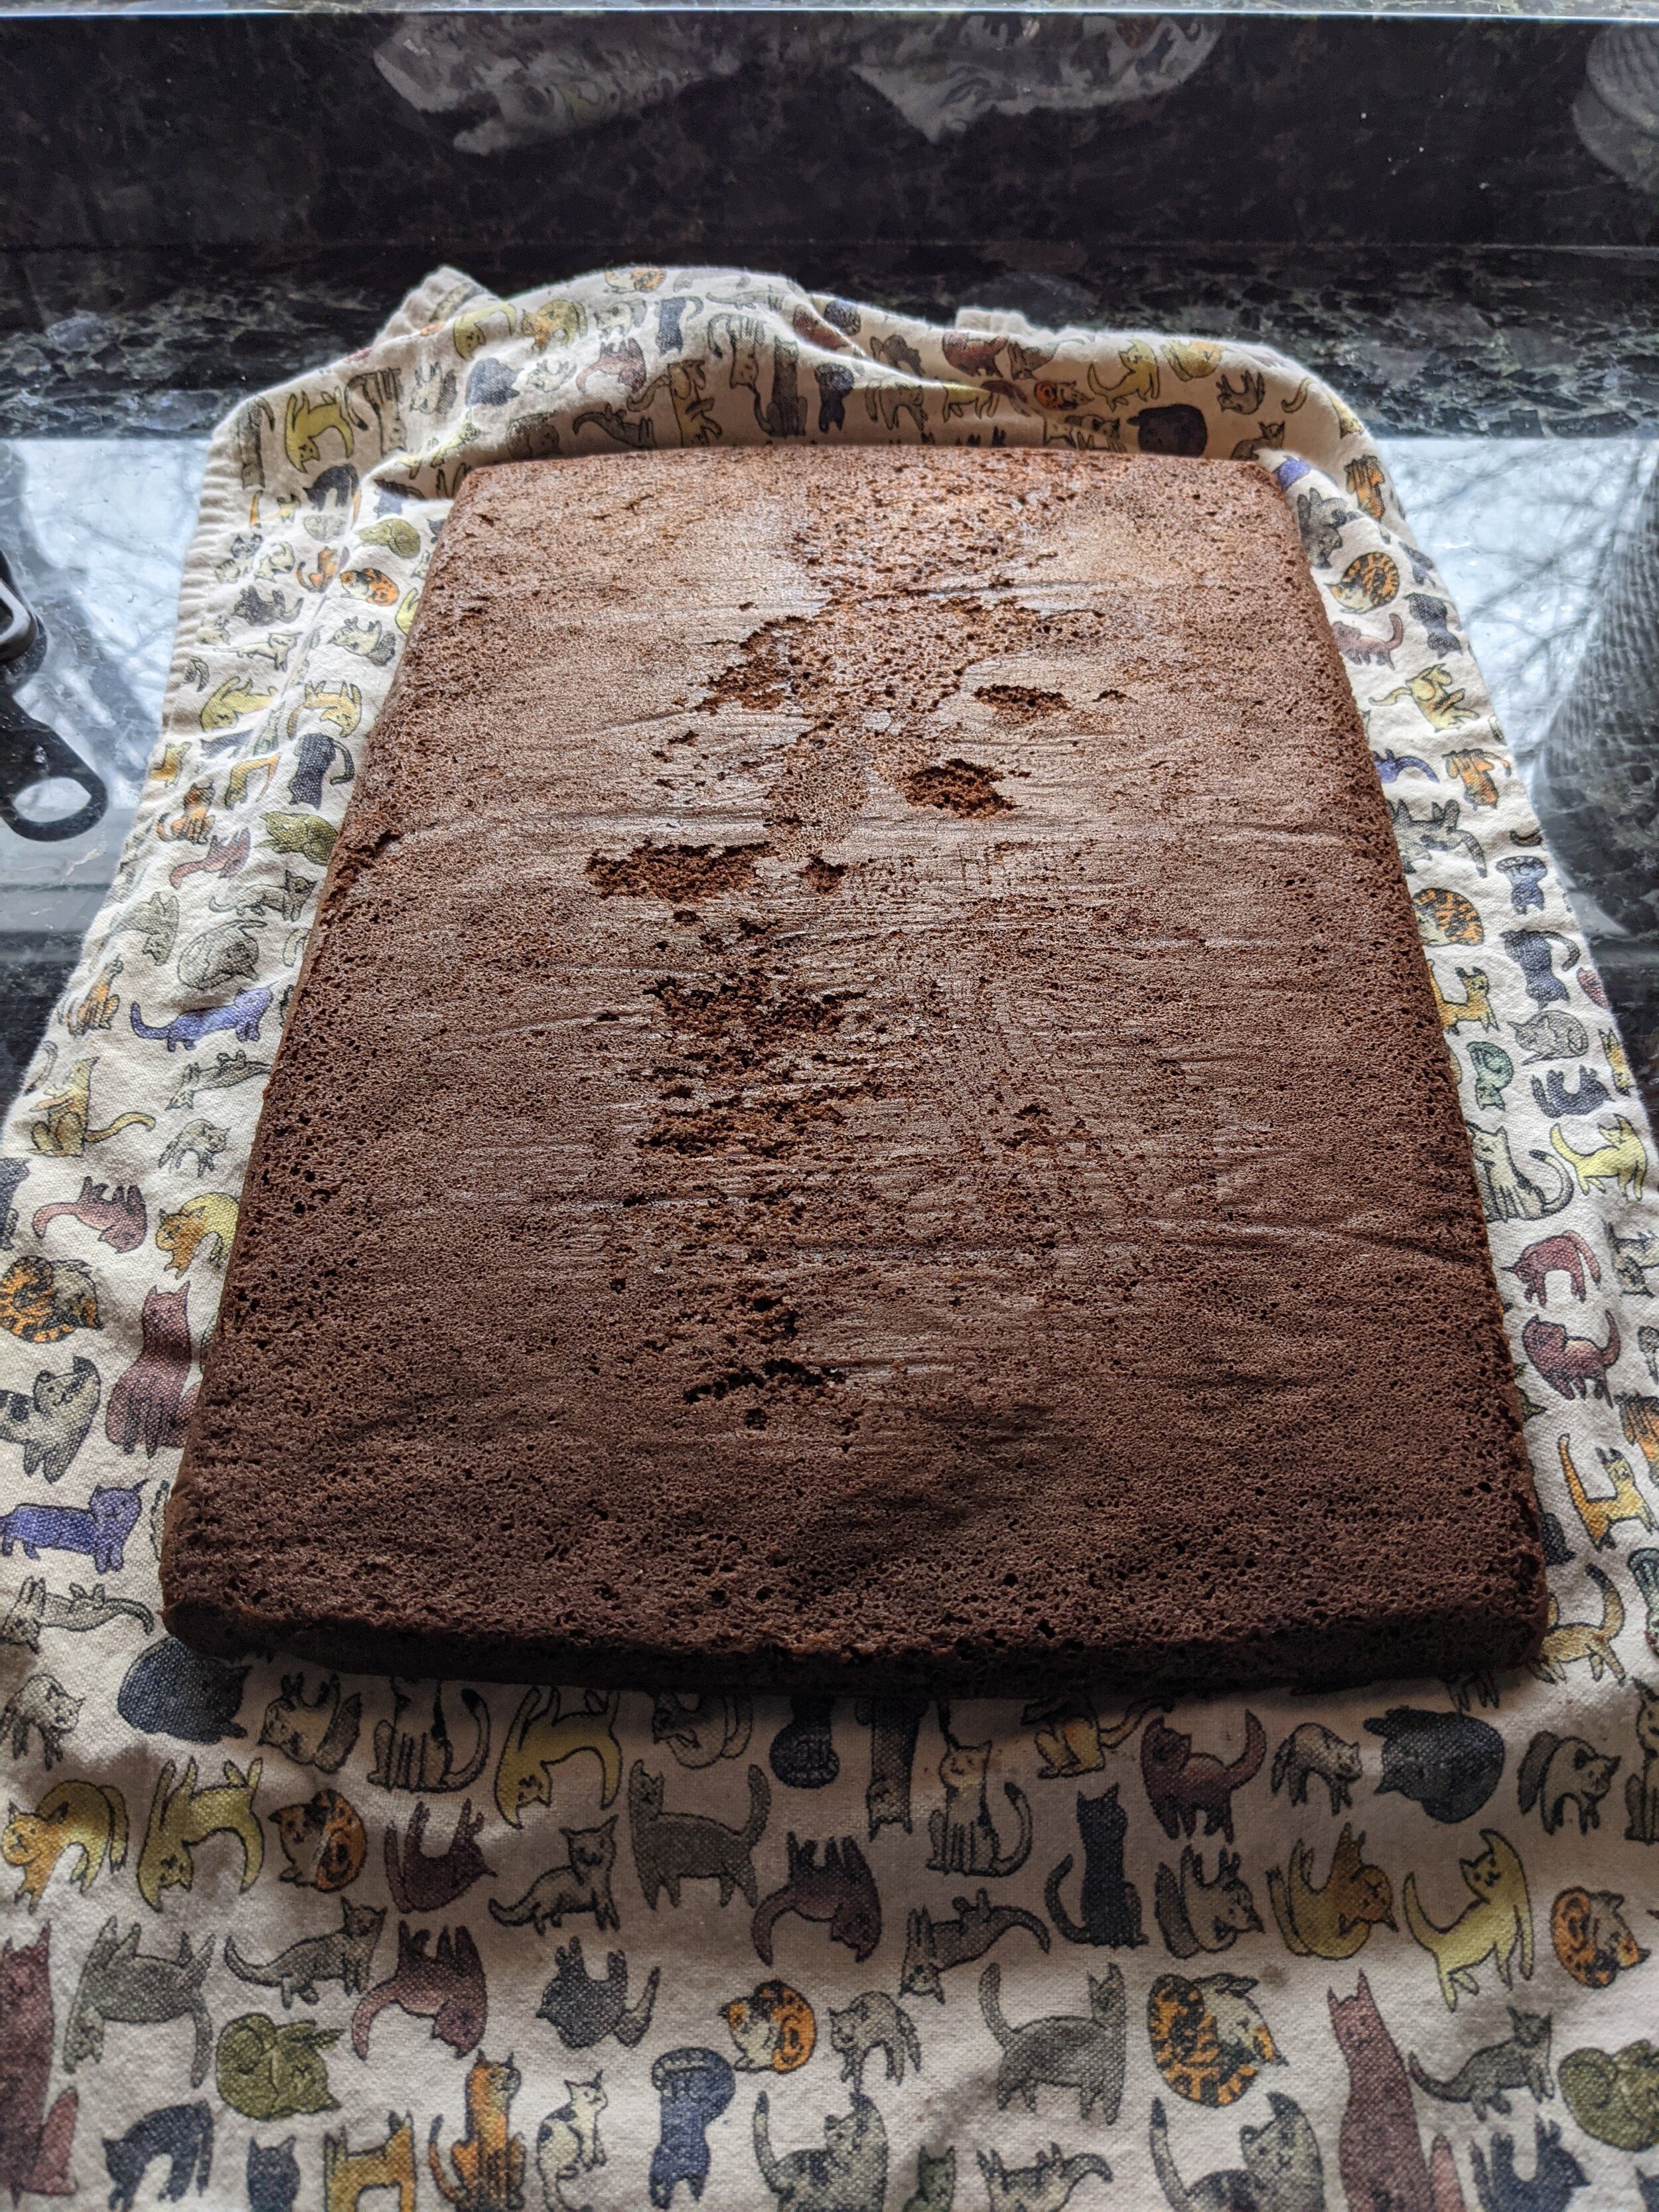
Once the cake is done, remove from the oven. Allow to cool for 2-3 minutes, or begin rolling immediately (depends on how hot your fingers can handle). Dust the top of the cake with cocoa powder to prevent sticking and cover in your large sheet of parchment or tea towel. Place the cutter board or additional cookie sheet on top, and using pot holders to hold everything at once, carefully rotate upside-down so the original cookie sheet is now on top.
Remember, the cookie sheet will still be very hot, so carefully remove and set aside. Pull off the original parchment from the cake. Dust this side of the cake with cocoa powder as well.
Carefully begin to roll up your cake with the parchment or tea towel. This will prepare the cake to want to roll again later, and the parchment/towel will protect it from sticking to itself. Allow the cake to cool for about 30 minutes.
Do not leave cake rolled like this overnight. It will stay in this shape too long and won’t want to unroll to fill.
Once the cake has cooled, carefully unroll and remove the parchment or tea towel. The ends will curl a bit as it wants to be a roll now.
Refresh your buttercream by mixing each bowl again. Over time, swiss meringue buttercream settles and thickens. You want it to be light when applied. If the buttercream was in the fridge it will need to come to room temperature before mixing again. If doesn’t look like it’s coming together quite right, heat a bit over a bain-marie and mix again. All of the buttercream ingredients need to be the same temperature in order to emulsify.
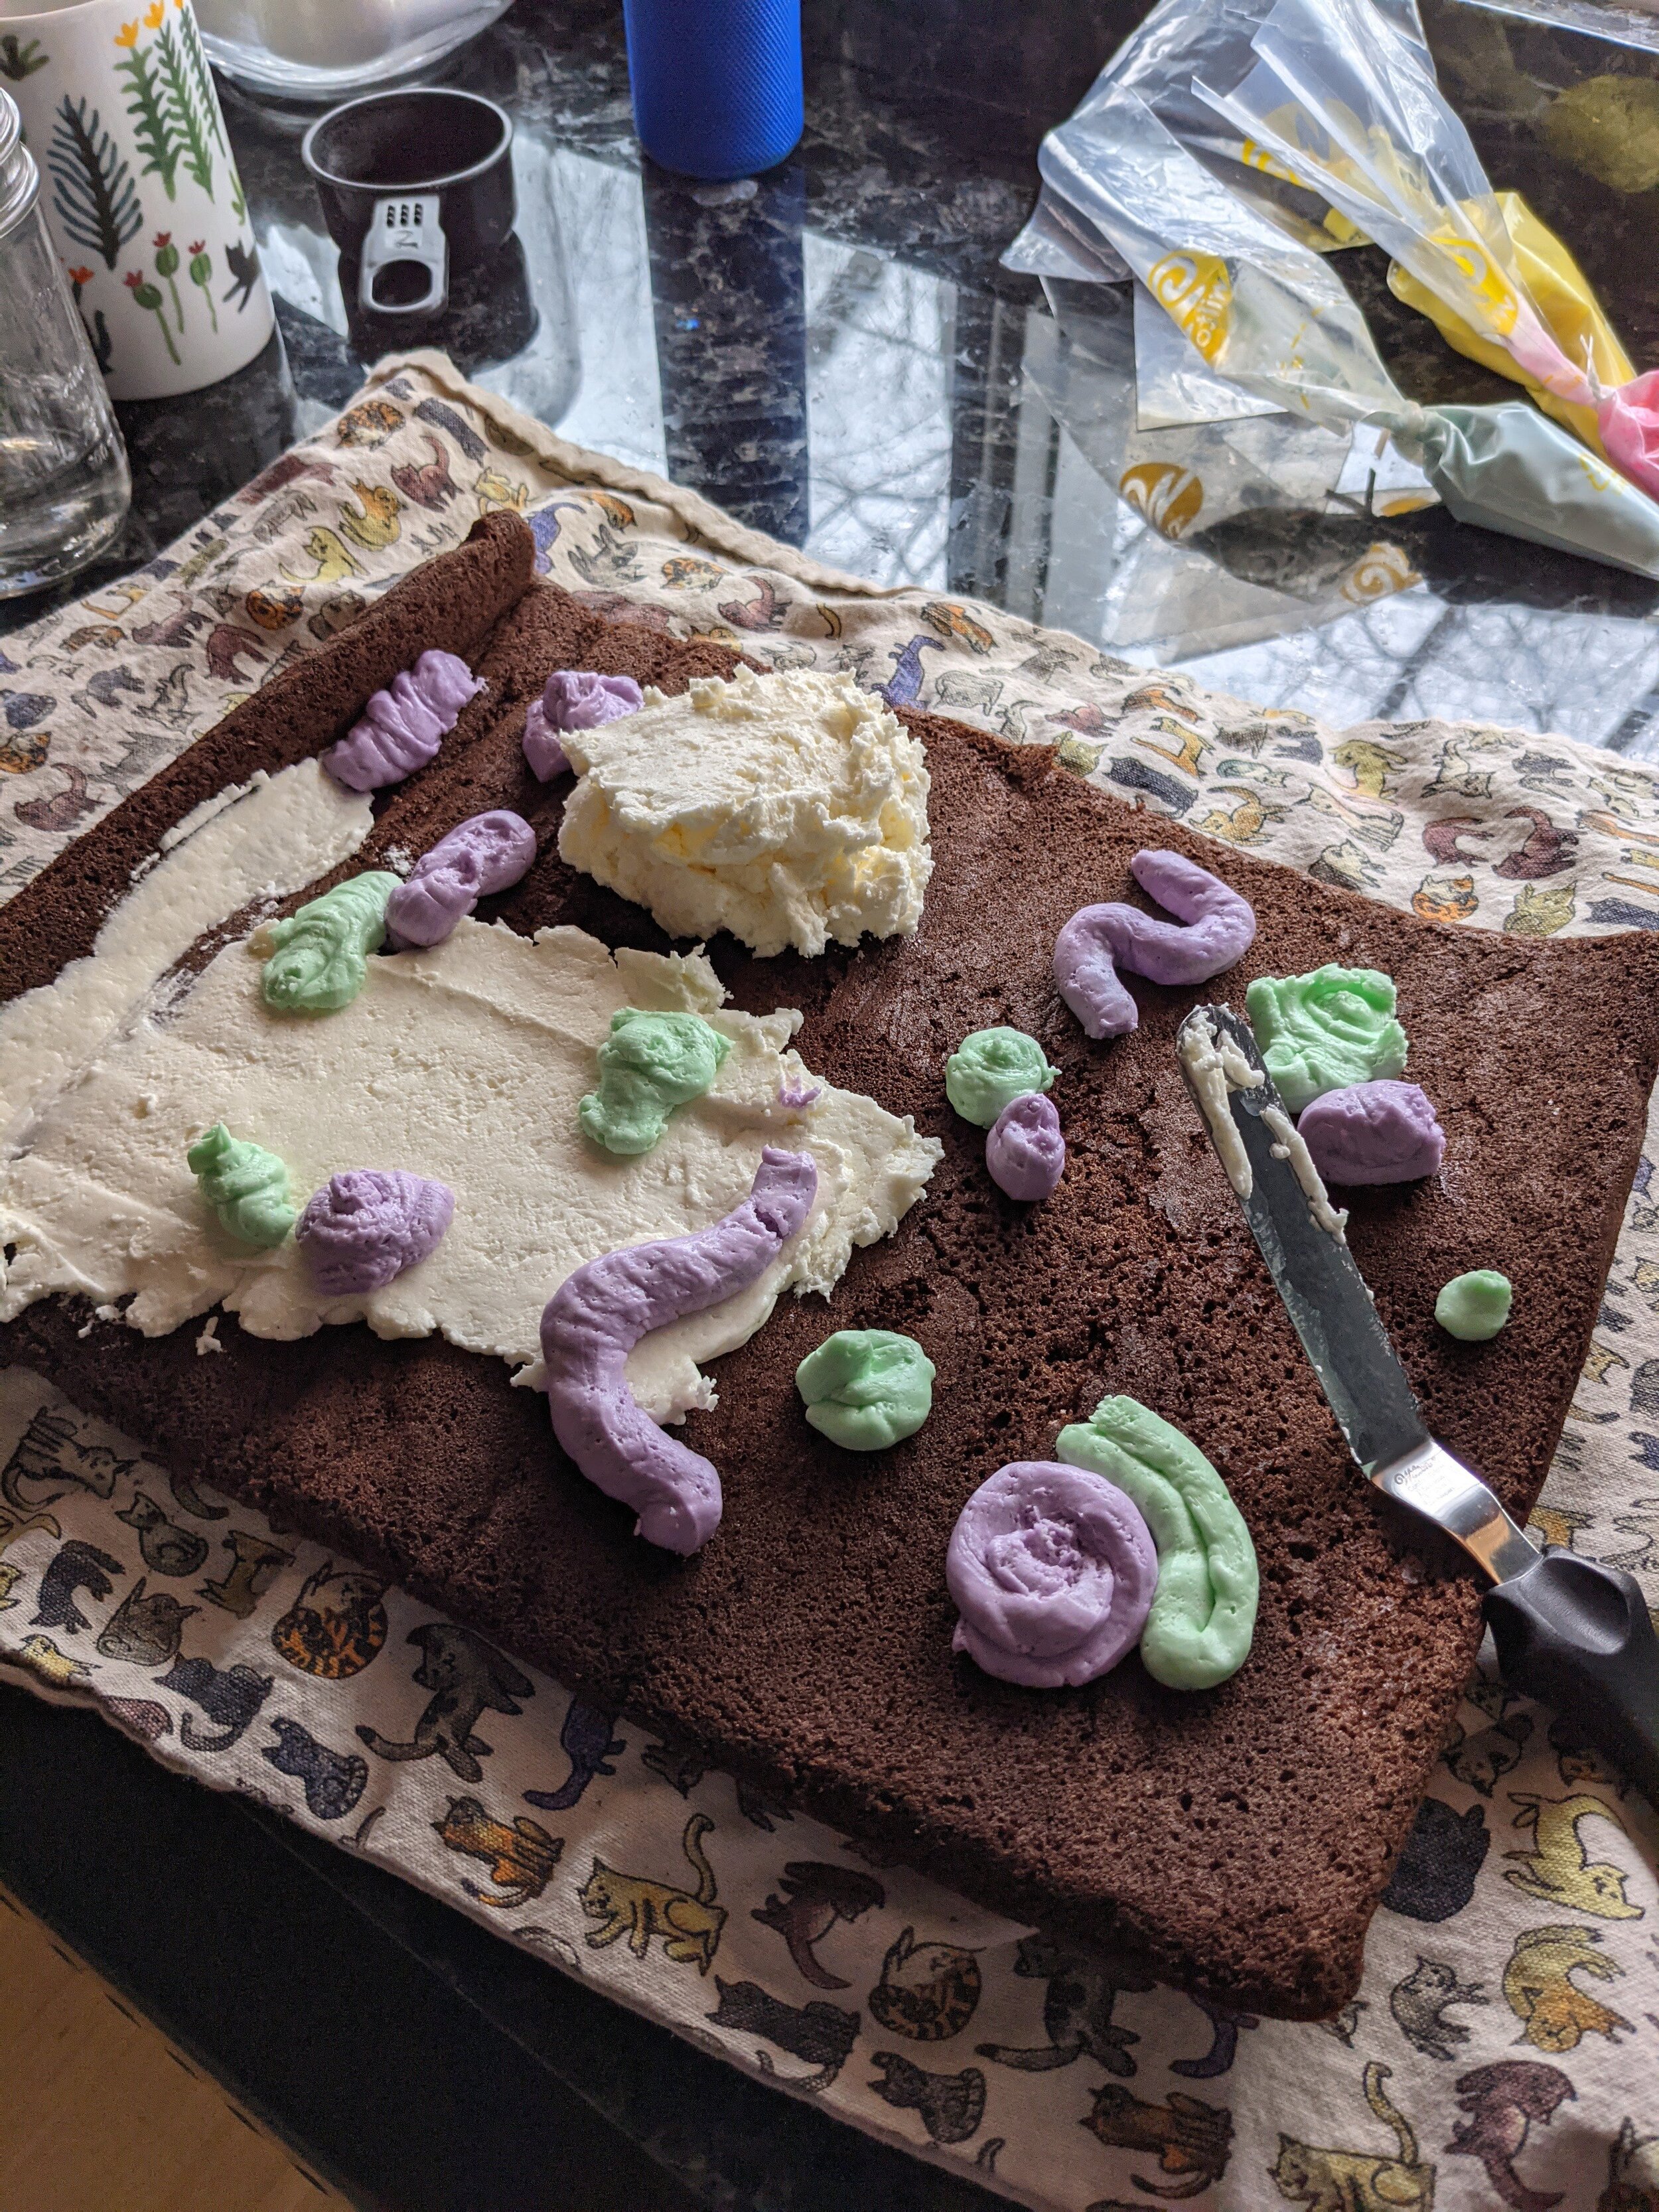
Use your creativity to apply buttercream to cake. Use spoonfuls to drop colors throughout, or use piping bags to place dots and draw lines and shapes. Don’t forget to fill in empty spaces with white, and feel free to layer colors. You can leave the buttercream like this and roll, or spread buttercream evenly with an offset to create a water color effect.
Be careful not to overfill with buttercream. Remember that you will have more than you need with this recipe, so just save the remainder for another project. Overfilling with buttercream will put unnecessary strain on the cake when rolling and could cause cracks.
To roll cake, gently roll with your fingers, or pull the parchment or tea towel upwards to begin the rolling motion. Continue rolling with slight pressure to create a tight, consistent spiral inside, but too tight can cause the cake to crack, so roll slowly so you can adjust pressure when needed.
Once cake it rolled up, you can slice off the ends and cut to serve right away. Or, for a cleaner slice and rounder shape, wrap in plastic wrap and place in the refrigerator for about an hour before cutting in to. Remove ends before serving or displaying. Cake can be stored on the counter for a couple days, or kept in the fridge for a couple weeks.
*You will have extra
**Fresh egg whites will whip up more, faster, but carton eggs will also work. Purchase a carton without additional ingredients (egg beaters usually have salt and xanthan gum etc) and you will have to whip it for significantly longer
***Baking soda will help the cake rise, but isn’t needed if the egg and sugar mixture are whipped up enough

This recipe sounds a little tricky, and it can be, but you really just want to pay attention to your textures and timing. When I was doing my test batches, I kept running into trouble because I wasn’t finishing the whole cake in a day. I made the cake one day and the buttercream the next, and by then the cake was too rigid to roll without disastrous cracks. Then, I made the buttercream first but didn’t rewhip it before it went on and that was too thick and broke the cake. Ugh, I started to feel like baking is just random and sometimes you get lucky. I feel that way about my photography too sometimes.
I wish I’d had pressed pansies to top this cake. The best I could find was candied violets, but they were quite lumpy and not very cute. I think I’ll make sure to have edible flowers in my garden this year and see if I can press and candy them for next time!
When you start this recipe, I recommend following the directions in the order I have them written. It felt weird to put the buttercream instructions first, but the buttercream will keep much better while you prepare the cake. Swiss meringue buttercream can be a little time intensive if you don’t make it often so it’s better to have it ready.

This was my first time successfully whipping up boxed egg whites. When I was practicing macarons in the past, I went through soooo many eggs. We had to eat omlettes a lot. I thought I had a great idea to start getting boxed egg whites. They’re cheap, less fiddly (no cracking eggs and breaking yolks) and just less weird. I want to say less wasteful, but I don’t know what happens in production. However, I only got flops. The macarons were soupy and goopy and just bad. When I switched back to fresh whites, I didn’t have any more issues. So, I kind of swore off boxed egg whites after that.
Since then, I’ve studied and gained experience, as well as learned from some of my favorite bakers about their techniques and tips. I was careful to get a carton that was only egg whites. No salt, no gums, added vitamins and minerals… And I just let them whip for foreverrrr. I still have reservations about making macarons with them, but at least for buttercream, they were great. I am always going to do this now.
Egg whites and sugar can go straight into the mixing bowl. I was using a glass bowl to heat over a boiling pot for too long before remembering it’s a good size and shape to fit on the pot. That is so much easier for me. With the bowl, I was having to try to keep it stable since it was a bit too big and would wobble around. Then I’d have to try to hold it with a pot holder and tip it into the mixing bowl. I wouldn’t want to waste any either so I would be balancing all of this while trying to scrape the bowl. It’s not the worst, it’s just awkward. Just popping the bowl down and locking it in to the stand mixer itself is much more efficient. Then, you can start whipping right away.

It’s going to take a while for these to whip up to stiff peaks, so I like to listen to a podcast while I’m doing this. Please someone listen to Mission to Zyxx so we can geek out together. The egg whites will get quite big and fluffy and shiny. You can check to see if they’re reached stiff peaks but removing the whisk and holding it upright. The merengue should stand up. Soft peaks will be…softer. The tip will be more like the tip of an ice cream cone with a little loop.
Once the egg whites are whipped up good, this lovely, fluffy, sweet cloud gets to turn into something real gross. Switch to the paddle here to get the butter mixed in well. Only once have I skipped the “looks curdled” stage, and that’s because I added the butter slowly, and everything was the same temperature. Most of the time, I don’t quite get the temperature right though. I usually forget to take the butter out early enough for it to get to room temp, and these days, my house is just really cold! So even room temp isn’t quite warm enough.
It’s not a problem though! If it comes together first try, you might be magical. And if it doesn’t, it’s easy to get it back on track! You just want to heat up the mixture over a boiling pot of water for a little while and then get it mixing again. The heat will get distributed throughout everything and the mixture will all cool to a state where it can begin to fluff up again.

When Swiss Meringue Buttercream is freshly whipped up, it’s the softest, lightest buttercream you’ll ever see. So light and so yummy. For this recipe, I used violet syrup, but this is definitely a great place to experiment! I have a bubblegum oil I have been wanting to try…
I love swiss meringue buttercream. I basically use it exclusively these days. But it’s important to remember that it can be a little fussy. It tends to settle over time. It’s important to whip it up again after it’s been sitting for a while before you use it. I made the mistake of coloring my buttercream and separating the different colors into pastry bags the night before one time. This meant I couldn’t really whip them up again before I piped. Because I didn’t whip them again, some of the colors got sort of weepy from the butter separating. Gross.
It’s not a bad idea to store the buttercream before you do any coloring. That way, when you’re ready to add your filling, you can whip it all at once and then separate it into bowls to make your colors.

On the left is buttercream that has been sitting at room temperature over night. Before whipping again, the buttercream has a mousse-like consistency.
On the right, the purple buttercream has been rewhipped after sitting at room temp over night. It’s has a much smoother consistency.
Buttercream on the left has not been rewhipped so has breakage and some separation.
Buttercream on the right has been rewhipped and it completely smooth and consistent in tecture.

Cake time! It’s important to have everything prepared before you really get in to things. So start by prepping your baking sheet with loads of grease so the cake doesn’t tear when it get tipped out later. Also, get the oven on and your bain-marie prepped. It’s also a good idea to get the dry ingredients mixed together so when you’re ready for them, they’re ready for you.
The egg process almost exactly the same here as it was for the buttercream. Eggs and sugar go into the mixing bowl and you heat it on the bain-marie. Easy. Since these are whole eggs instead of just whites, be careful not to let the mixture sit before it goes over the heat. Sugar and egg yolks together create a chemical reaction that will cook the egg yolks. So, once they start to live together, get them on the heat and stir.

Once the eggs are happy and warm, move them to the stand mixer and let it whip them while they’re cooling. Sounds familiar? Although, this time, instead of going for stiff peaks, we’re going for the ribbon stage. The ribbon stage is pretty cool. The eggs will get super fluffy and light. You should be able to lift some of the mixture up and when it runs back into the bowl, there will be a sort of ribbon that floats on top for a few seconds. Cute.
While the eggs are whipping up, I like to melt the butter. I start with 15 seconds, swirl it around, then another 15, and swirl it again. Just this is usually enough heat to get it melted without going really far, and there’s always a little solid chunk still trying to hang on, but the residual heat takes care of that. You don’t want to blast it so much with heat that it takes forever to cool! I like to melt it while the eggs whip up so they have time to cool down but they don’t sit so long that they re-solidify (it’s happened and it’s annoying).
Now you can start adding other things. Start with butter and flavor, and then, slow the whisk waaay down to add in the dry ingredients. You want them to just mix together long enough so there aren’t any lumps. Any longer than that risks the air getting knocked out of the batter. I find this easier than folding in the dry ingredients. I always end up with lumps still.

Tip the batter onto your prepared baking sheet. It should be able to handle a minute of gentle spreading so it’s even and reaches each edge. Then, let it bake in the oven for 10-12 minutes.
Ten minutes works well for me. Since it’s such a thin cake and it needs to be flexible when it comes out, you don’t need to bake it very long. In fact, taking it a little too far can make the edges crispy, which will cause problems when you go to roll. If this happens though, don’t worry. You can just slice off the ends with a sharp knife!
When you roll up the cake for the first time, it doesn’t have to be very tight. You’re mostly creating a curve so when you roll it again the cake wants to be in that spiral shape. If you really pack it together you’re probably going to have a hard time opening it back up without tears. Just be gently. You’ll be able to feel the cake resisting if you begin pushing it too far.
At this point, you just need the cake to be cool enough to fill, so once it rests for a while, you can open it back up and go nuts with your buttercream design. I did a test that was quite colorful based on the cute, chalky pastels of candy hearts, and my last test was something a bit more romantic with cute pinks and purple. This cake it meant to be fun, so don’t hold back if you really want to go all out with color! Just have a bit of restraint when it comes to the amount of filling. With a whipped cream filling, you can pretty much go to town on how much goes in because if it’s too much, it will get squished out of the ends. This buttercream is more structurally sound though, so it will push back against the cake and could burst through. I try to go for roughly equal thicknesses of cake and buttercream. Although, that didn’t happen this time! Oops.

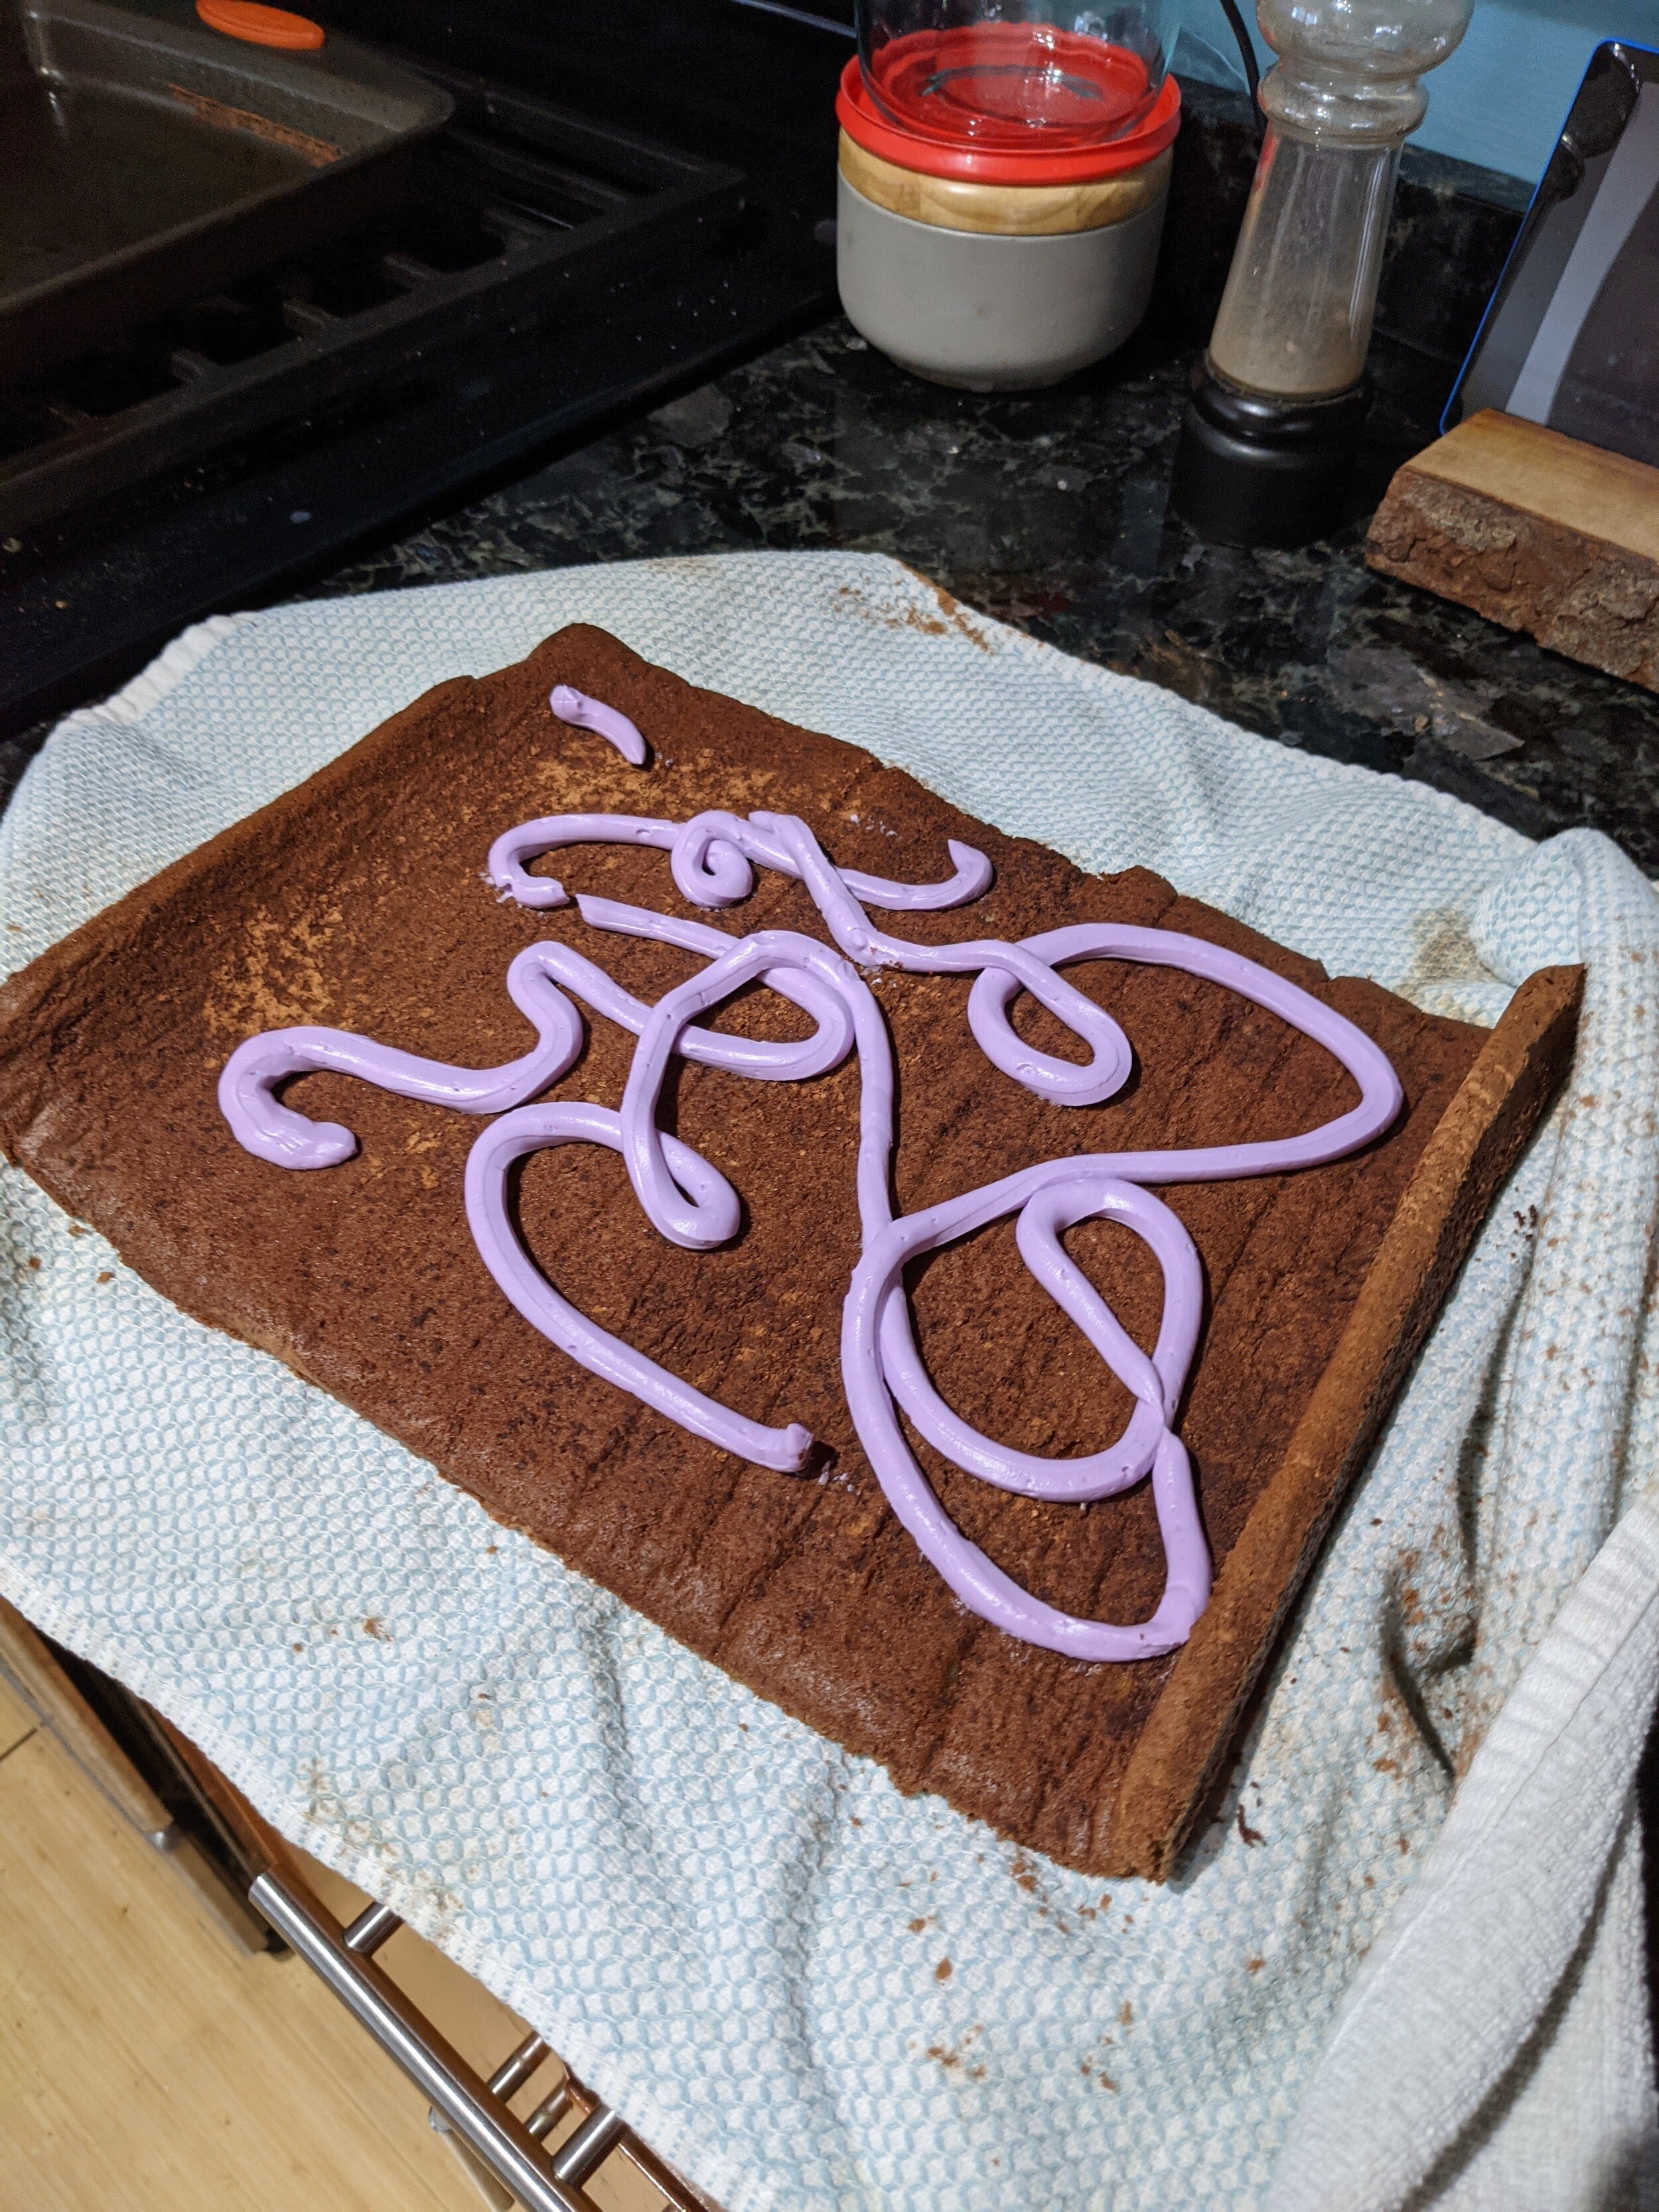
Rolling the cake back up can be intimidating. Over time, if you make these a lot, you’ll get used to the gentle touch the cake wants. You might get a few cracks on the way, but if you’re careful, they won’t be a disaster. I wanted to decorate this subtly so I just dusted some more cocoa powder on top!
I like my swiss rolls to be quite round, so I try to get them wrapped and in the freezer right away. Sometimes I even put them upright in a glass to keep it from resting on one side. Then, when you slice it cold, the slice will be nice and sharp. I think I rolled my last cake a little too loose, and then let it rest on what would normally be the top of the roll because when I look at this swiss cake roll, it looks backwards to me! Haha, it’s fine. I really just wanted to have fun with this one so I’m trying not to get too uptight about the final result. It’s easier to accept these flaws too when it tastes so good.

Have a lovely Valentine’s Day. Be kind to yourself. This year I want you to take a quiet moment to tell yourself that you matter and you are where you are supposed to be right now, even if it doesn’t fit with what you had in mind. Open your arms and accept love from your friends, your family, from your neighbors, their pets, and from yourself.

