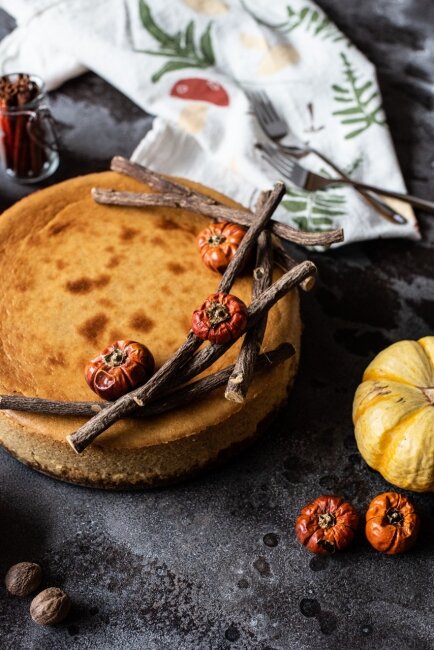
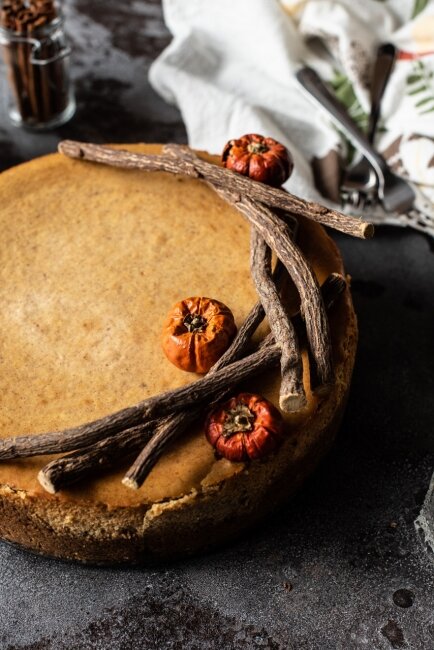
Pumpkin Cheesecake (GF)
Gluten Free Cinnamon Pumpkin Cheesecake
Crust
2 cups crushed, gluten free graham cracker crumbs
4oz unsalted butter
1tbs sugar
Cheesecake Filling
32oz cream cheese (4 boxes)
16oz pumpkin puree (2 cups, or 1 can)
1 1/4 cup granulated sugar
1/2 cup sour cream
1/4 tbsp gluten free flour
2 tsp vanilla extract
4 eggs
1 tbsp cinnamon
1/4 ground ginger
1/8 ground cloves
1/8 ground nutmeg
The first thing you want to do is take out all of your cold ingredients. The key to a smooth cheesecake is mixing everything at room temperature. So you’ll want to leave the following items out on your counter; cream cheese, pumpkin puree, sour cream, eggs. Good job.
Preheat your oven to 375°F.
While everything is coming up to room temperature, you can prep your crust. For this cheesecake, I went with Pamela’s Honey Graham and crushed them up in a mortar and pestle. You can whizz them up in a food processor too, I just prefer the mortar and pestle because I like the sound the crackers make when they’re crushed. One box is enough for one crust. Crushed, you should have about 2 cups.
Mix together your 2 cups of crushed graham crackers with 1 tablespoon of sugar.
Melt 4 ounces of butter and add to your graham cracker and sugar bowl. Mix until the butter has completely and evenly saturated the crumbs and pour into a 9-inch springform pan. Gently press the crumbs flat over the entire bottom surface of the pan using your fingers or the back of a spoon. Set aside.
Once all of your ingredients are at room temperature, you can start with the filling. Begin by adding all of the cream cheese to your mixer and mix on low with the paddle attachment until it is soft and fluffy. You’ll have to scrape down the sides and the bottom of the bowl a couple times to get everything (don’t be lazy!).
Add the sour cream and mix on low until combined.
Add the eggs and mix until combined (scrape down those sides!).
Add the pumpkin and mix until combined.
Now you can mix together the sugar, vanilla, cinnamon, ginger, cloves, and nutmeg until everything is combined and smooth.
Woohoo! You should now have a big bowl of smooth, spicy, pumpkin gloop. Pour the cheesecake batter on top of your prepared crust in the springform pan.
In order to bake a perfect cheesecake with no cracks, you want to use a waterbath to regulate the heating of the pan. Since we’re using a springform pan, there’s risk of water leaking into the pan and getting your crust soggy, so you can wrap a layer of aluminum foil around the bottom for extra protection. This worked totally fine for me, but if your foil still lets in water, you can use a roasting bag around the pan. These are meant to go in the oven at high temps, so they won’t melt (unlike plastic wrap, which I tried, and it melted).
So, secure your foil or bag around the pan, set it in a deep cookie sheet or a roasting pan (there are disposable roasting pans at the grocery store if you don’t have one large enough), then place in the oven. Fill a kettle with water and pour into the cookie sheet or roasting pan carefully while it’s sitting on a rack in the oven. By pouring the water in after you’ve moved it, you’ll prevent spills on the way in.
Bake for 1 hour and 10 minutes! For the last ten minutes it’s a good idea to keep an eye on it to make sure nothing burns.
To check doneness, wiggle the pan a little (BE SUPER CAREFUL YOU DON’T BURN YOURSELF ON THE WATER AHHHH). The edges should be pretty sturdy and the middle will have a bit of a jiggle. Jiggle is good, as long as it’s not totally liquid in the center. When it gets to this point, you can remove it from the oven and let it cool completely on the counter. The center will stiffen up as it cools.
Please let the cheesecake completely cool before you try to remove it from the springform pan. It will actually start to pull away from the sides on its own as it cools. If you try to force it, it will tear. Booooo.
That’s pretty much it! You can put the cheesecake in the fridge to hurry up the cooling process, and make sure you store it in the fridge, covered in plastic or an airtight container.
My last tip – Cutting slices with a knife can get messy, and you’ll have to clean the knife after every cut so it doesn’t all gloop together. So, I recommend slicing with floss or fishing wire to get nice, even, sharp cuts. You hold the floss taught as you press down, and then pull the floss out the other end. Tadaa! Perfect slices!
Happy Thanksgiving!
Yeah, I’m a little late. I wanted to get this recipe out there earlier but I caught a rough head cold and ended up not being able to work.
As much as I wanted to stay on schedule with PUMPKIN MONTH (cue fireworks, and earthquakes and babies being born), I needed to take care of myself. Getting better was the most important thing I could do, because my brother invited me to his house for Thanksgiving, and there’s nothing in the world that could have topped that invitation.
I was thinking about it this morning, how lucky I am to have both an older brother and older sister. There are a lot of perks to being the youngest (I got away with a couple things), but there’s nothing quite like having two different kinds of people to look up to growing up. My sister was like another mother to me and would tell me to clean my room, and my brother would hold me at arm’s length while I tried to propeller arms at him. I know these aren’t the dreamiest examples of loving relationships between siblings, but I don’t want to paint the picture that things were perfect between us. Sometimes, they were, and sometimes they weren’t. But as I was remembering this, I realized that I don’t actually personally know many people that grew I like I did, with both a sister’s and brother’s love and influence. And I feel incredibly lucky for that. I think I really got to, and continue to, experience something special.
We all live hundreds of miles apart now. My sister is across the country with her husbands and children, and my brother and his family are a bit closer, but it still takes us between 9 and 12 hours to drive there. Visiting just isn’t something we can easily do. The kids have school. Everyone else has work. Money. Time.
So, getting better to get to see everyone was my number one priority. I had one more pumpkin recipe that we just won’t get to, but I’ll save it for another time. Instead, I saw my niece, who has a sensitive heart like I do, my nephew who is a tiny nerd in the making, my sister-in-law, the most creative person I know, and my brother, who told my niece that my middle name is bathroom, but who also hugged me and told me how happy he was that I could be there.
For our final pumpkin recipe of November, we’re going to make a cheesecake! So get out your leftover pumpkin puree and let’s get started. When you’re finished you can share some with your neighbors. They’ll say, “ah! Oh no, not more food!”, but they’ll still take it.
Well, that’s all for me for November. Next month I want to do another round of themed recipes. I’m thinking Christmas cookies! I hope you check back with me soon to see what I’ve cooked up.
Happy Thanksgiving everyone!
-Lisa


