


Cream Puffs (GF)
Hellooooo
I said I was going to bring you creams puffs, and I finally have!! I'm going to try something CRAZY and give you the recipe up here, and if you'd like more info, you can continue to the rest of the post. This recipe is egg city, so make sure you have a loooot of eggs.

Makes appx. 18 choux buns
Choux Buns
1 cup (8oz) water
1/2 cup (4oz) unsalted butter
5oz gf flour
4 1/2ish eggs (8oz)
1 tbsp sugar
Pinch of salt
Preheat oven to 375˚F and prepare a baking sheet with parchment paper. Trace 2 1/2 inch circles onto parchment. Set aside.
Bring water, butter, sugar, and salt to a boil. Once it has reached a boil add sifted flour stirring continuously for 3 minutes. Mixture should form into a sticky dough. Let cool for at least 10 minutes.
Lightly whisk together eggs (save any remaining egg for egg wash) and add, one at a time, to dough. Mix on low speed until all eggs are incorporated and batter is smooth. Transfer mixture to a piping bag.
Pipe straight down into center of traced circles until circle is filled (be sure drawing marks are on opposite side of paper). Pat down tips with wet finger and light brush with eggwash. Place tray in oven, spray bottom of oven with water, and bake for 16-18 minutes until golden.
Remove tray to cool and poke small hole in the bottom of each bun. Let cool completely before filling.
Chantilly Cream
1 cup heavy whipping cream
2 tbsp sugar
1 tsp vanilla
Combine ingredients in a small bowl. Whip with electric mixer for 3-5 minutes until light and fluffy. Keep stored in airtight container in the fridge.
Creme Patisserie
2 cups milk
6 tbsp sugar
pinch salt
2 1/2 tbsp cornstarch
1/2 tbsp vanilla
3 large egg yolks
1 large egg
3 tbsp butter
Heat milk and vanilla on stovetop until just barely simmering.
In a separate bowl, combine sugar, salt, and cornstarch. Add eggs.
Slowly pour half of the warm milk mixture into small bowl of egg mix, whisking continuously. Pour mixture back into pot and return to heat. Whisk until mixture thickens into a custard, about 3 minutes. Add butter and stir until combined. Cover and store in fridge.
Blackberry Creme Patisserie
1 1/2 cup milk
3 large egg yolks
1/4 cup sugar
1 tbsp gf flour
4 tbsp cornstarch
1/2 cup fresh blackberries
1 tsp vanilla
zest of 1 lime
1 tbsp unsalted butter
dash of salt
Heat milk and vanilla on stovetop until just barely simmering.
Blitz fresh blackberries in a food processor until pureed. Pass through a sieve to remove seeds. You will have approximately 1/4 cup puree.
In a separate bowl, combine blackberry puree, lime zest, sugar, salt, cornstarch, and flour. Add eggs.
Slowly pour half of the warm milk mixture into small bowl of egg mix, whisking continuously. Pour mixture back into pot and return to heat. Whisk until mixture thickens into a custard, about 3 minutes. Add butter and stir until combined. Cover and store in fridge.
Coffee Creme Patisserie
2 cups milk
6 tbsp sugar
2 tbsp espresso powder
pinch salt
2 1/2 tbsp cornstarch
3 large egg yolks
1 large egg
3 tbsp butter
Heat milk on stovetop until just barely simmering.
In a separate bowl, combine espresso powder, sugar, salt, and cornstarch. Add eggs.
Slowly pour half of the warm milk mixture into small bowl of egg mix, whisking continuously. Pour mixture back into pot and return to heat. Whisk until mixture thickens into a custard, about 3 minutes. Add butter and stir until combined. Cover and store in fridge.
Chocolate Ganache
1/2 cup heavy cream
4oz semi-sweet chocolate
Gently heat milk and chocolate on stovetop until melted. Stir to combine. Remove from heat and let cool 5-10 minutes because using.

I've been sitting on this recipe for almost a YEAR. I was nearly done when I took a break from it. I knew I wanted to do one more test of the blackberry filling because I wasn't totally happy with it, but then something came up, or we went on vacation, or I just forgot and ended up putting the whole project on the back burner.
But I have it now! I expected to go back to my recipe, do a test, and be done, but then I realized I wanted to change basically everything and add more fillings. Everytime I moved a fresh creme pat to the fridge to cool, I thought, hey, why not start another one while I wait? Let's put in coffee this time! But you know. It adds to the workload every time.
I'm glad I did it though. These cream puffs are all really delicious, and I still have more and more ideas for how to fill and top them. I'm even thinking about just doing a cream puff month where I try a new filling each week. I HAVE GREAT IDEAS.


So, I'm going to walk you through the steps a bit. These really turned out to be quite easy to make, after I figured out a couple small but significant details.
First, you need to cook the dough. Whaaaat. Yeah. So add your water, butter, salt (please don't use kosher - the granules are too big) and sugar to a small saucepan and crank up the heat. You want your butter to completely melt and start to bubble around the edge of the pan. So, while this is warming up, you can get your flour situated.
YOU HAVE TO SIFT THE FLOUR.
Every recipe that tells me to "sift the flour" I'm like, pfft, yeah ok I'm totally gonna. I just don't want to. I always make more of a mess and then I have to clean my sifter (takes like 2 seconds) and how am I supposed to measure AND sift ugh. So, if I tell you to sift the flour in a recipe, I really mean you HAVE to. You can't be lazy on this one because if your flour wants to stick together anywhere, you're going to get major lumps and your buns will come out seriously weird and not a nice round ball. So. Do it this time.
After you have DEFINITELY SIFTED YOUR FLOUR into a bowl, wait until your water and butter mixture has started to boil and then pour your flour into the saucepan. You want to stir in your flour with a big wooden spoon until it forms a big lump of sticky dough. I set a timer when I start for 3 minutes because even after it has all come together, you want to cook off some of the water. 3 minutes should do it.
Once you've completed stirring, plop your dough into the bowl of your stand mixer and let it sit and think about what it's done. Your next step is going to be adding eggs, so you have to let it cool for a bit so the eggs don't cook. While your dough is cooling, you're going to see the butter start to leak out. That's OK! When you go back to it and start stirring, it'll come back together.
So, while the dough is cooling, you can prepare the eggs. I also usually turn the oven on at this point. I found out that my oven takes a reaaaally long time to come up to temp even after it beeps (my husband said that's when the coil shuts off but doesn't necessarily mean that it's at temp. I definitely believe him), so to be sure it's ready, I turn it on pretty early. Set it to 375˚F.
This was the longest series of tests on my part because the amount of eggs in the dough is the absolute most important part of this recipe. I tried between 3 and 8 eggs and found the 4.5 eggs is where you want to be. That sounds ridiculous, but it's really the best option. The egg is your leavening agent. What. Like baking soda or yeast, the eggs create air inside your batter. This is what's going to create a pocket in your buns for yummy fillings. You want exactly 4oz of eggs, so you really want to measure them once you get them in a bowl. Crack 5 eggs into a bowl, lightly whisk, and gently scoop out a little bit until you hit the sweet 4oz mark. Save this extra egg though! You can use it for the egg wash later.

Once your dough has sufficiently cooled (doesn't have to be cold, but can't be hot - I usually watch an episode of Bob's Burgers while I wait, and then it's pretty much fine), begin stirring with the paddle attachment on low. Add a little bit of egg at a time. I shoot for about 1 egg's amount with each pour, all while keeping the mixer on. Wait between each addition for it to be mixed thoroughly and pause here and there to scrape down the sides. Once all the eggs have been added, continue mixing until the dough is completely smooth. If you see any lumps in here, just keep going. When I started this recipe, I was worried about the eggs curdling and often didn't mix enough. I think you don't have to worry about it so much though. You really really want it to be a smooth, kind of runny batter.
Prep your baking sheet with a sheet of parchment paper. It helps to draw circles on the back to help you pipe the batter consistently. I have some circle cookie cutters so I use the 2.5 inch circle and trace the inside with a pencil or marker onto my paper. Be sure you flip the parchment over once your done so you aren't piping onto your markings. They'll transfer onto your buns! Your hot buns!

Scoop your runny batter into a piping bag. You don't need a tip for this, but if you really like to use them, I recommend a circle tip. If you aren't using a piping tip, just snip off the end of your piping bag when you're ready to go. Pipe straight down onto your tray. No need to do anything fancy. No swirls. Just keep piping in the center of your circle until the batter fills the area. When you release, there will be a point that comes up from the top like a chocolate kiss. Gently pat it down with your finger (dampen your finger with water first to keep it from sticking), otherwise, the tip will burn in the oven.
Once your tray is full, apply your eggwash. Mix in a little water to your leftover egg (you can add another egg if it isn't enough) and gently brush on with a pastry brush or dab on with a spoon or your finger. I didn't have a pastry brush for years and I just pat it on with my hands. I'm so gross, right? No, I'm awesome.
OK! Ready for the oven. Place your buns in the hot oven, but before you close the door, sprits a little water underneath. The water will turn into steam and help crisp up the outside of your buns as they cook. This isn't a make or break moment, so don't worry if you don't have a spray bottle handy. Leave your buns in for 16-18 minutes until they are beautifully golden.
It's fun to check on them throughout the process. They rise nicely and develop a pretty, crispy shell. Don't worry if some of them come out lopsided or funky shaped. They like to do whatever, but for the most part, because we sifted the flour, blended everything until smooth, and used small grain salt, they should be pretty cute and round(ish).
BUT PLEASE DO NOT OPEN THE OVEN.
These puppies need steam to rise. If you open the oven the steam will escape and they will come out flat and sad. Don't do this to me.

When time is up, remove your tray to begin cooling. Now you want to release any steam that is still in your buns, so you want to poke a small hole with a toothpick in the bottom of each bun. A lot of your buns will probably have cracks that are already opening enough of the surface to let out steam, so you can just skip poking those.
Let them cool completely before filling! So let's work on the filling in the meantime. Here I will give you the regular creme pat recipe, but will note where you would change things for other flavors.
You want to start with the stove top for the creme pat as well. Measure out your milk (I use lactaid whole milk) and vanilla extract (omit for coffee flavor) and begin heating on the stove. You want it to almost start boiling. You might see a bubble here and there, and if you tip the saucepan a bit you should see a bubble pattern on the bottom of the pan.
While the milk is getting to temp, in a small bowl combine the sugar, salt, and cornstarch. If you're making coffee, add the powdered espresso here. I also added a drop of brown food coloring because I wanted it to look a little darker. Don't add black though. It will look disgusting. If you're making blackberry, add pureed, strained blackberry and lime zest. Probably don't combine both. That sounds gross.
Once your dry ingredients are combined, add the eggs and mix. If you add the eggs without combining the other ingredients first, your eggs will start to react with the sugar and start to cook. Weird, right? Yeah. So, just to be safe, do it in this order.

When your milk is ready, you want to slowly pour about half of it into the bowl of dry ingredients. You want to be whisking everything together into the bowl while pouring, so it can be a little tricky. It helps to set your bowl on a pot holder or tea towel to keep it from sliding around while you're whisking. I always spill some milk in the process. But, I have my bowl on a towel so I can just wipe it up right away! Genius!
So, whisk whisk whisk for like 20 seconds, then transfer the bowl mixture back into your saucepan with the rest of the hot milk. Place it back on the burner and continue whisking FOREVER.
Ok, not forever, but you do want to keep whisking, constantly. I set a timer for myself here as well, because I can't keep track of time very well when I'm baking apparently, and I start to worry that it's never going to come together because it feels like I've been whisking longer than I actually have. Another 3 minutes is usually when it starts to thicken up into a custard like state. It's so cool when this process starts. You can't see it yet, but you start to feel the pull on your whisk that it's getting thicker. Once your three minutes are up, your custard should be creamy and hefty. Remove from heat and transfer to a bowl small bowl. Add your butter and stir until it is completely melted and combined. Cover with plastic wrap to keep a skin from forming on top. Creme pat likes to be chilled, so it's a good idea to pop it in the fridge for a bit before you fill the choux buns, and keep it stored there.
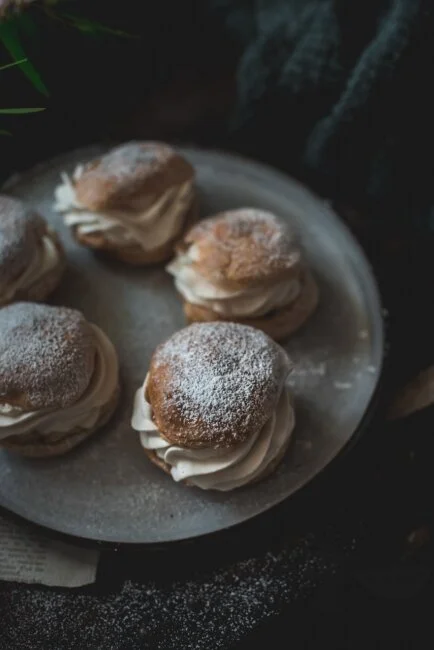
At this point, you have a choice of topping for your buns. You can leave them plain (no work required! Yay!), or dust some powdered sugar on top, or dip them in this super silky, shiny chocolate ganache.
Stove time! I hope someone is washing your saucepans for you because you need it again. This one is super simple though.
Pour milk into your saucepan, and toss in your chocolate, broken into pieces. Heat on medium, whisking periodically. You don't want the mixture to get real hot, you just want the chocolate to melt and completely combine with the milk. Eventually, this will turn into a beautifully dark lake of chocolate drizzle. Remove from the heat and let cool for 5-10 minutes.

TIME TO ASSEMBLE
Fill a piping bag with the creme pat. You can fit this with a small round tip, or just snip off the end of the bag. Whatever makes your life easier. You can use the toothpick hole in the bottom of the choux buns as a starting point for filling, or basically anywhere you want to get in. I like the hole on the bottom because then you don't notice the entry point, but the side is also a good option. Fill it up!
Complete with your chosen topping. If you made the chocolate ganache, just carefully dip the top of the choux bun into the pan, let it drip off any excess, and let it sit for a few minutes to set. It won't get hard, but it will tighten up a bit.
The possibilities are endless with these cream puffs. That's why I just can't stop making them! Have fun. Try new things. EAT THEM ALL. But if you want to save some, make sure you store them in an airtight container in the fridge. They'll only be happy in there for a day or two, so show your friends and eat 'em up.


UPDATE: April 19, 2019 - corrected egg weight from 4oz to 8oz

